Toyota Belt Tensioning Tool: Made in the Wrenchtech Garage

June 17, 2018 - by Matty D

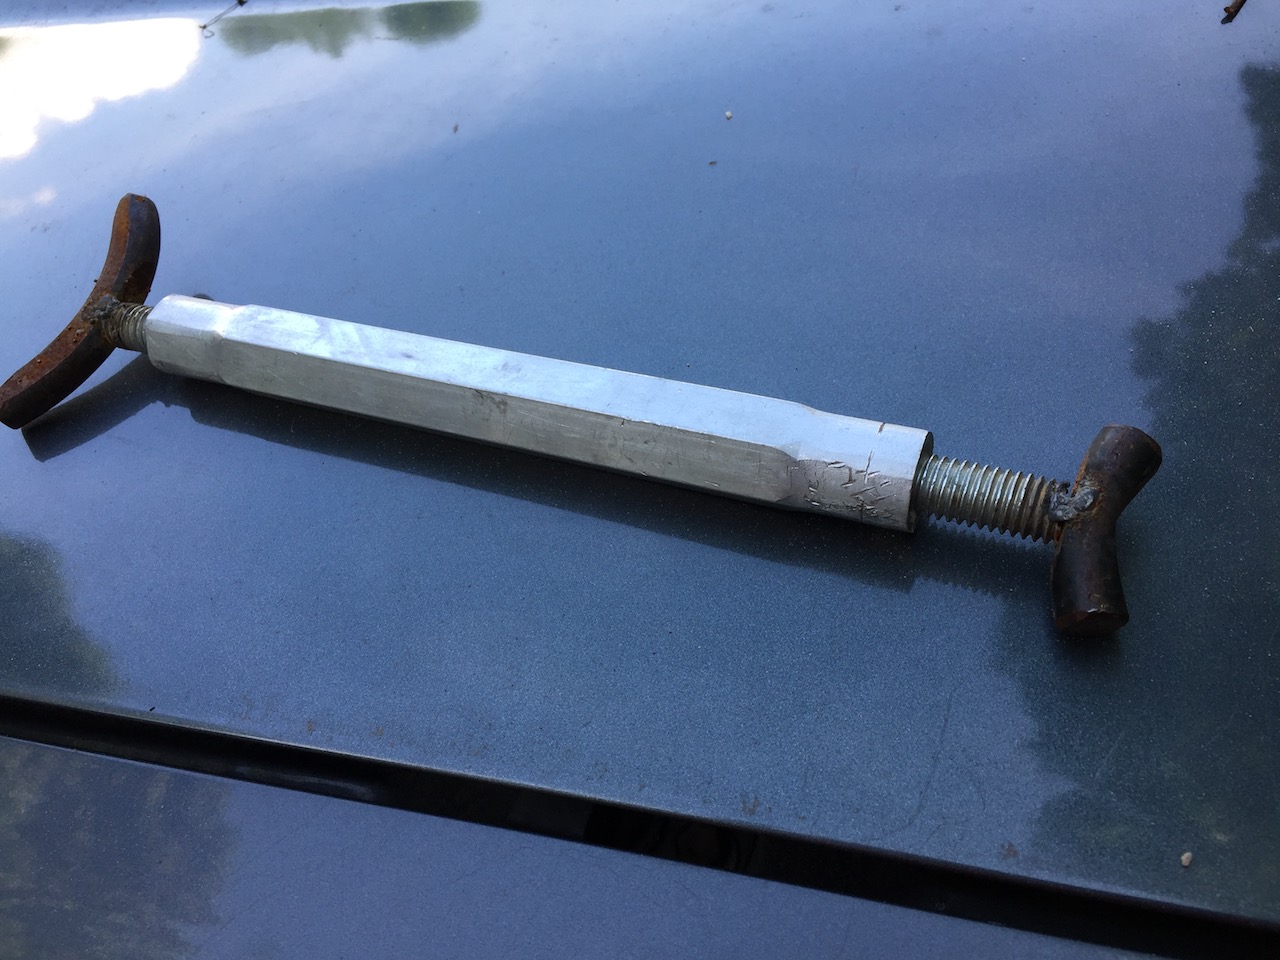
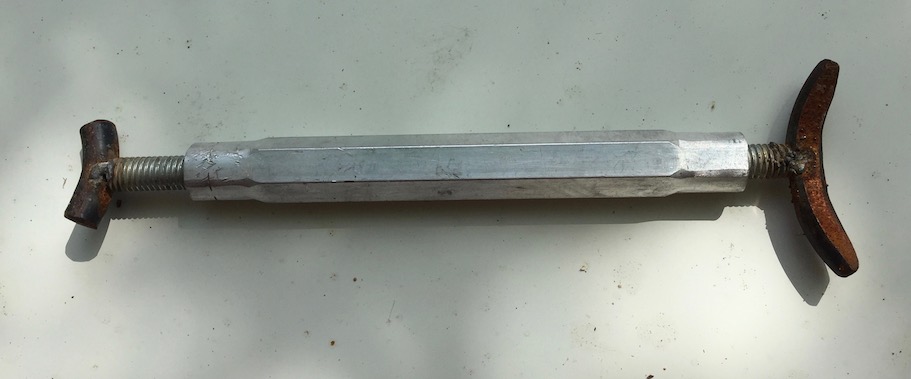
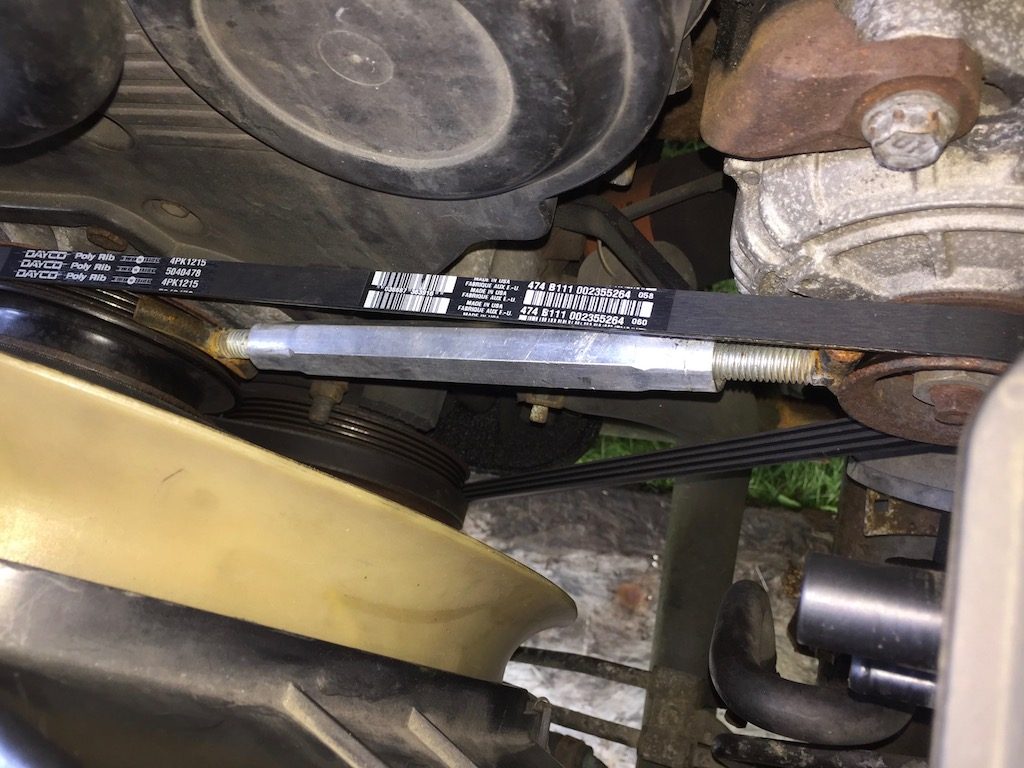
If there is anything that I like better than using tools, it is making tools. Even the simplest tool, thrown together in a few minutes, gives me great satisfaction. I felt that satisfaction again today as I used my homemade belt tensioning tool to help me solve a squealing belt problem that had developed on my 1989 4runner. Many times in the past I resorted to wedging a prybar between the engine block or the timing cover and the alternator to try to lever it over to get tension on the belt. Working on my first generation 4runner I just couldn’t find away to make those crude methods work, and so I constructed a tool.

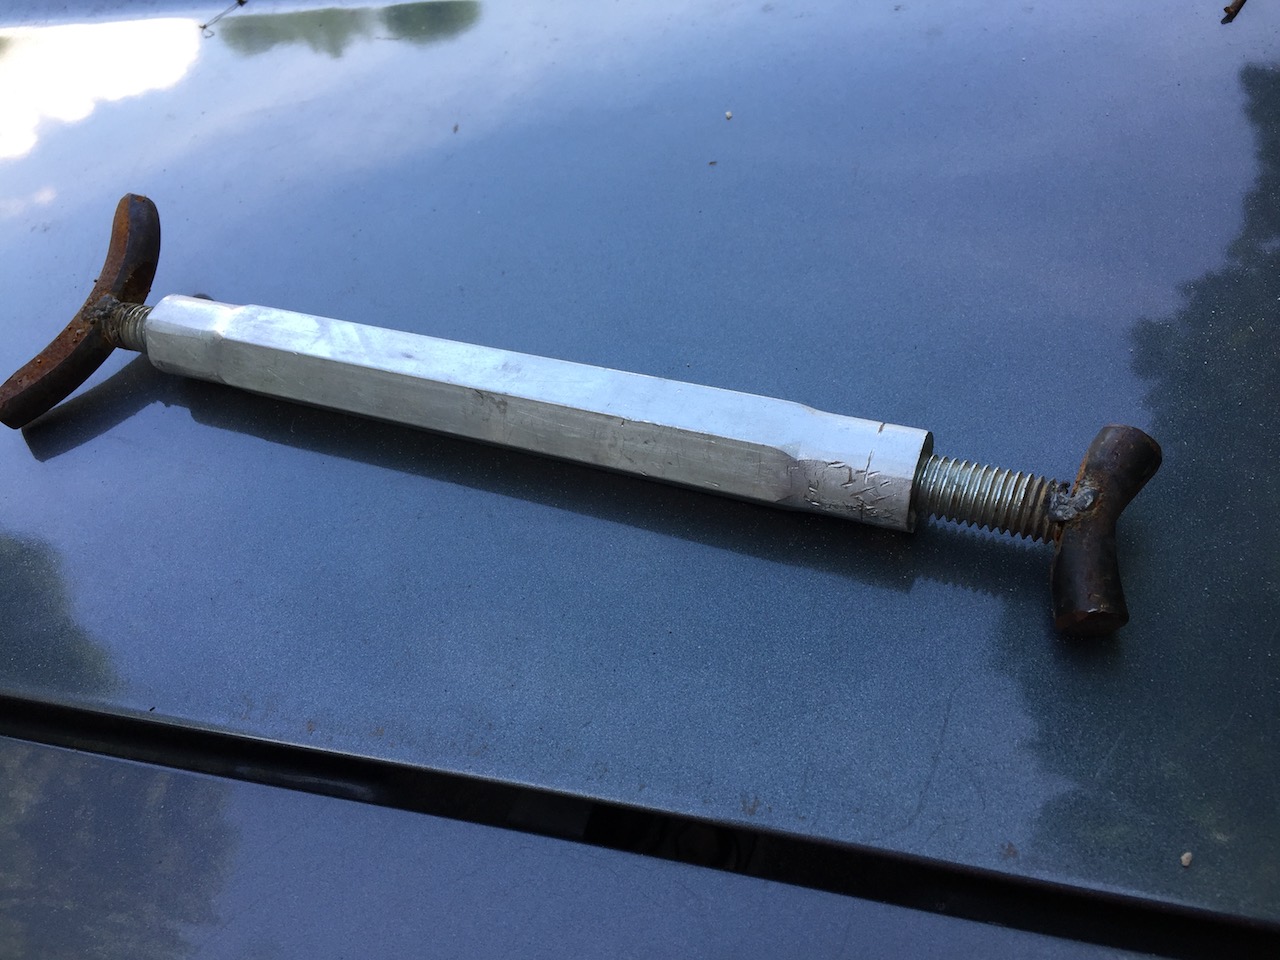
It’s about a simple as things get. I went to the local hardware store and bought a 10 inch turnbuckle. Most hardware stores have them. They consist of a threaded collar that forms the body of the turnbuckle and a pair of screw eyes, one at each end. One of the screw ends has a reverse thread. This allows the turnbuckle to become longer or shorter when the body is rotated. If both had a conventional thread the collar would simply move along the threads without changing the length of the turnbuckle. By having two different threads, turning the collar causes each threaded eye to move out of the collar or go deeper into into it depending on which way the body is being turned. 


This
Into This

I cut the eyes off the turnbuckle ends and welded some curved sections of steel that I cut out of a junk coil spring that I had. The shorter section goes up against the alternator pulley and a larger section pushes against the crankshaft pulley. Once the tensioner tool is in place I simply turn the collar by hand, causing it to spread out and push the alternator away from the crankshaft. The collar has a hexagonal shape with flat surfaces to grab with a wrench, but I have never had to use a wrench. I’ve always been able to get sufficient tension on the belt just by turning the turnbuckle sleeve by hand. To finish up I just tighten the alternator bolts before releasing the tension tool. 

My custom-made tool works like a dream. It goes into place easily, fits snugly and only takes a few seconds to set the tension. I have a long list of tools still to be made, so please sign up so that I can send you an email when the next project starts.
I Feel a Sandblaster Project Coming On

March 24, 2018 - by Matty D

March 24, 2018 - by Matty D

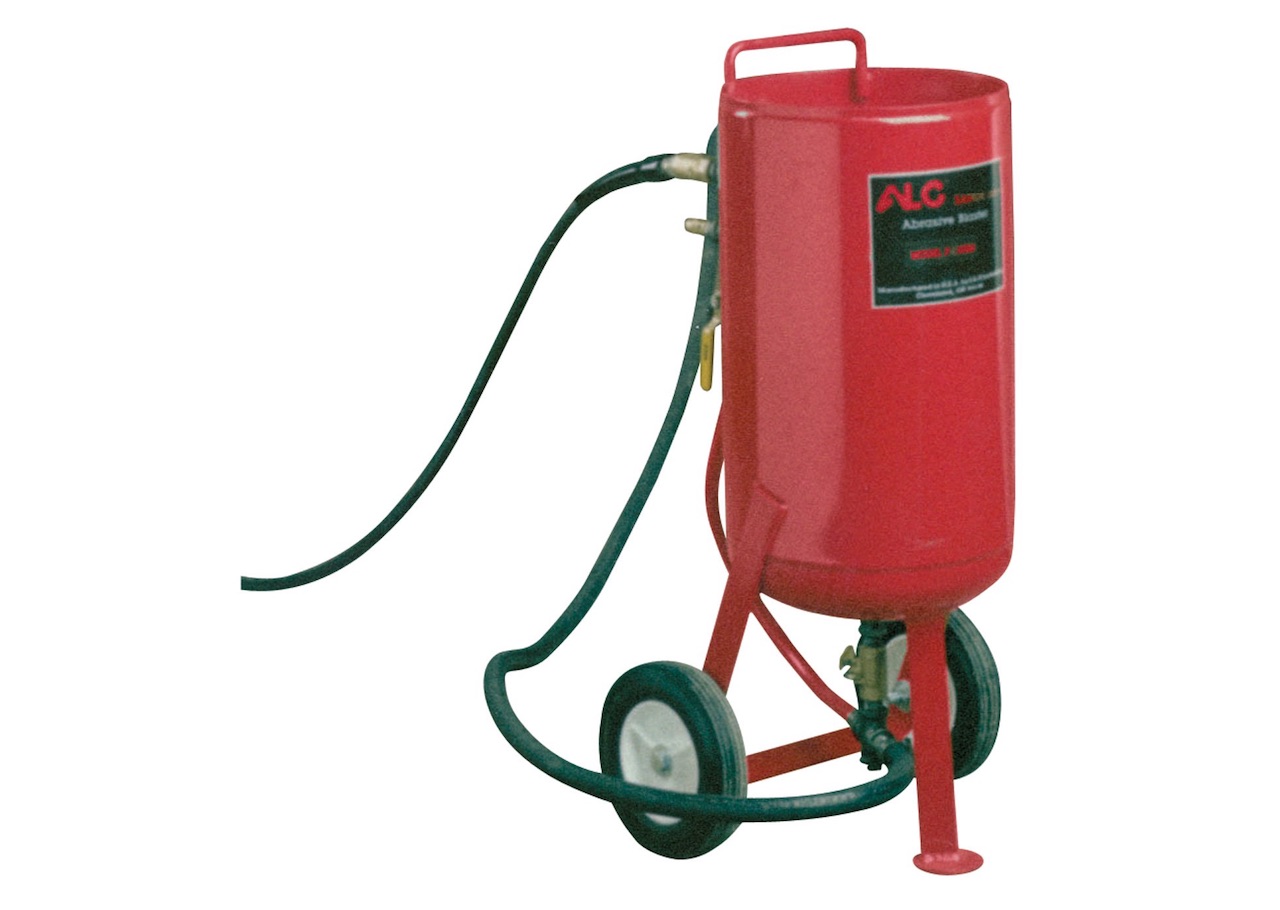
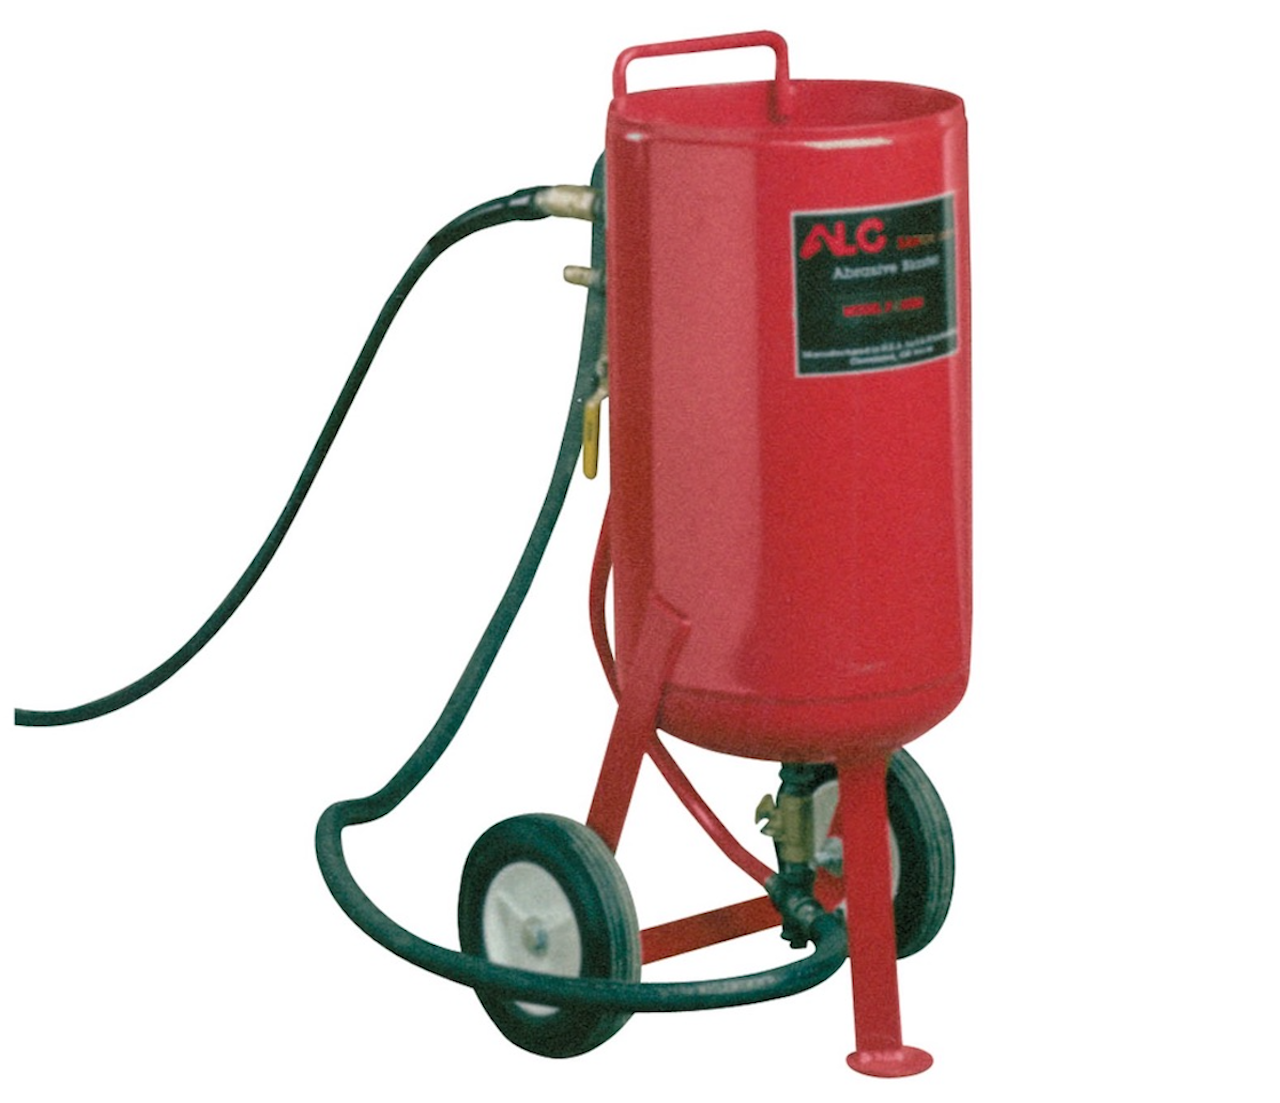
Pictured above is an abrasive blaster that sells for about $600 at Northern Tool (and about a million other places). I have a 40 pound propane tank and a set of wheels that would give me a good head start on the materials that I need to make my own version. Some parts that I would need to buy would include a deadman valve/blast gun/nozzle holder, some blast hose, assorted pipe fittings and valves, a water separator, and a pressure relief valve.

Blast hose is the most expensive item, running about $10 a foot. A deadman style blast gun would run about $55. I figure I might have $250 or $300 into the entire project by the time I’m done. In any case, after calling around to get some prices for sandblasting services, I can see that this thing will pay for itself in no time.


A DIY Stand And Holder For Axle Housing Work

march 23, 2018 - by Matty D

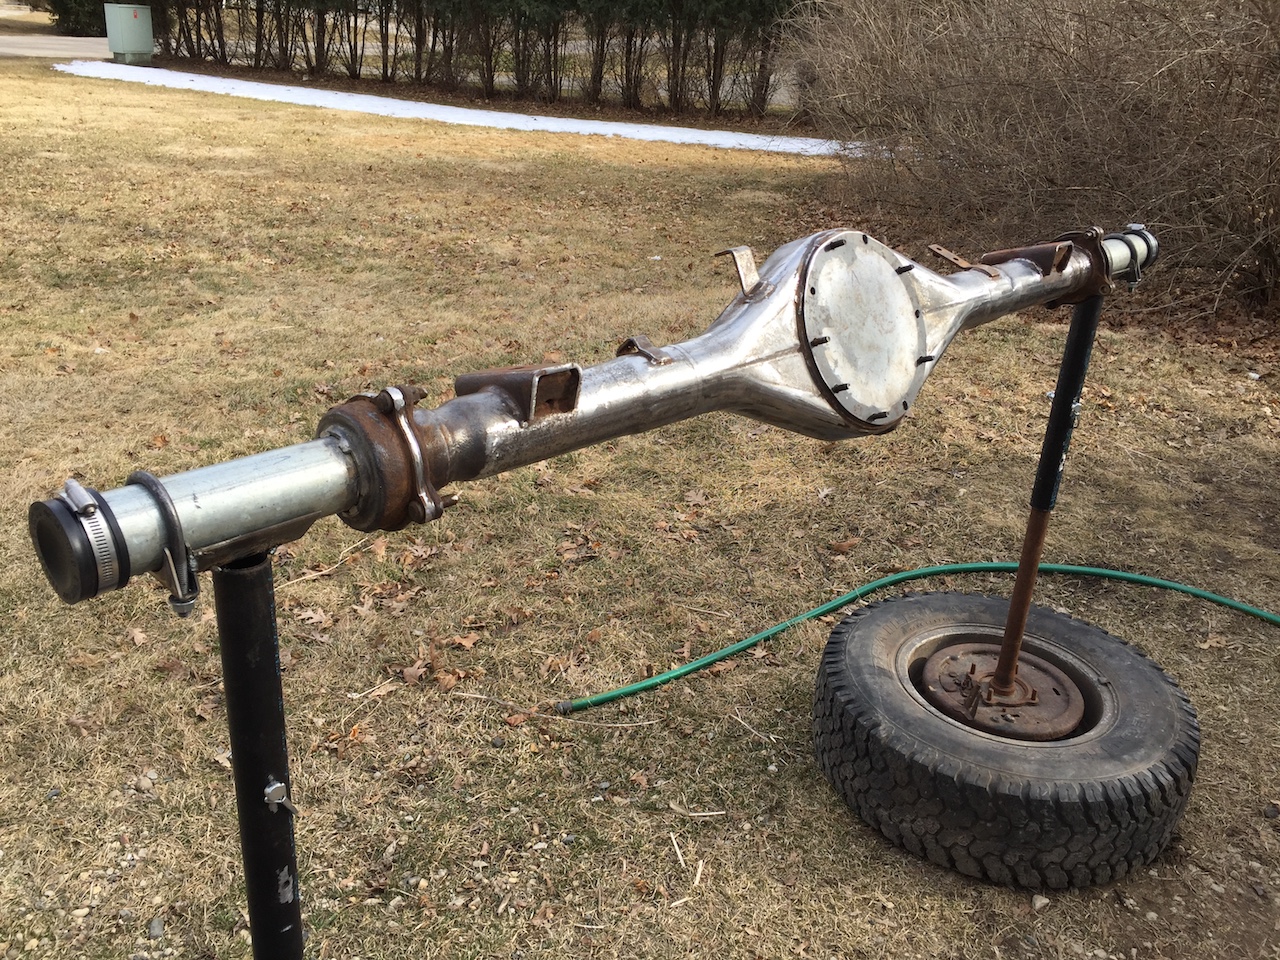
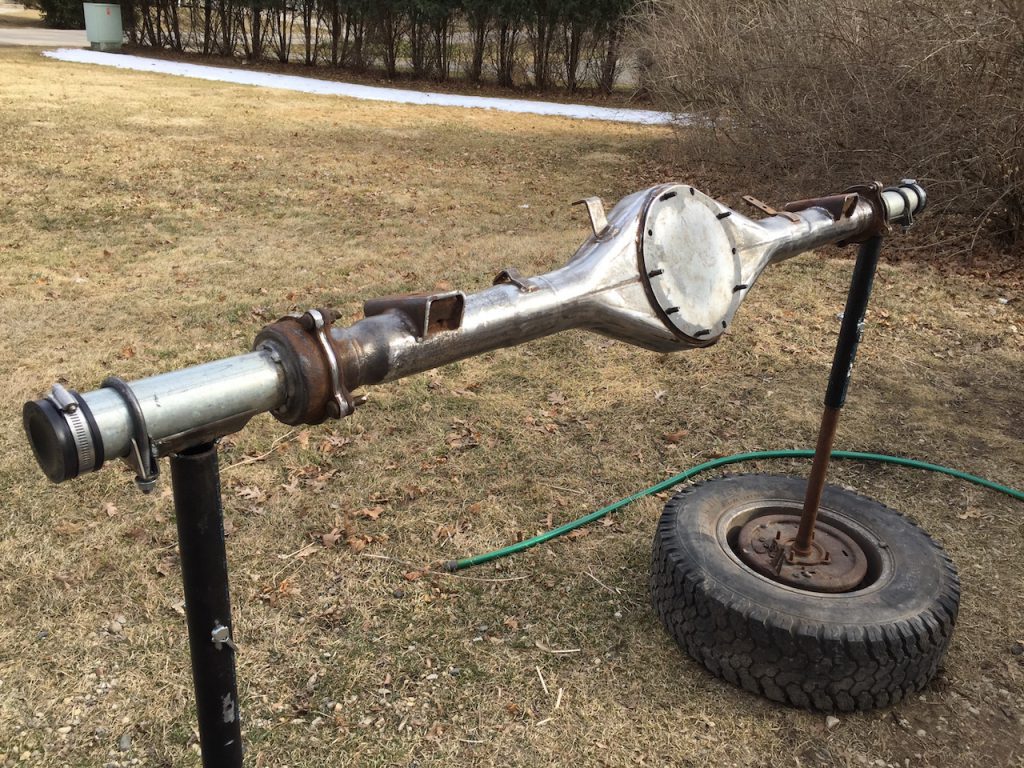
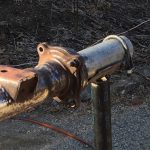
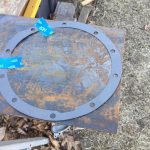
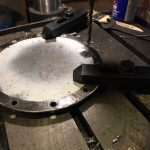
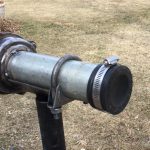
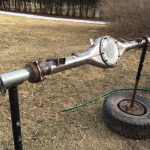
There is no sense in struggling with big awkward items like axle housings when it’s fairly easy to make tool or a jig to do the job. I wanted something to hold these housings while I clean them up and paint them. I had a pair of old style short Toyota truck axles that I had been planning to make into some kind of stands that looked perfect for this job. I bolted them to a pair of wheels and then realized that I needed some extensions to make them taller. I also wanted to create some saddles for the housing to rest on, and of course, some way to attach the housing so I could lock it down in different positions while I am working. I also want to be able to cover the axle housing openings so that I don’t get grit and debris inside.

I think I made a solution that meets my needs. I used mainly scrap metal and junk auto parts so it only cost me about $8. In a world where everything is getting pretty spendy I am pretty pleased with the results and the ultra low cost.

If you keep following my posts you will see that I am all about getting maximum fun for minimum dollars. An idea that I put that idea into practice at every chance.

Poor Man’s Porsche is a VW?


December 28, 2017 - by Matty D

Every time I see this image I find myself loving this Volkswagen Karrman Ghia again. It just looks right. The same way that a properly set up Porsche 911 looks right. This view from the rear is definitely the money shot. I like everything about it from the taillights, to the quarter panels to the the way the windows and roof line shape the top of the car. Every time I look at it I start thinking I could graft some Porsche Boxster suspension pieces onto it. I think about attaching a Subaru flat six engine to the front of a Porsche transaxle and using it to convert the Karrman Ghia from a rear engine car to a mid-engine car.

Unfortunately the front end does not do justice to the rest of the car. I want to like it, but it looks too much like the face of a cartoon animal.

I would love to forget about all other cars and own a Porsche 911 from the early 70s. Of course, that’s a popular idea and I am just another cash strapped dreamer. The 911 has become wildly popular with the money crowd and the prices have risen accordingly. It is also impossible to manufacture a car like the 911 today due to environmental and safety regulations. This has resulted in a situation where a run-down, unrestored 911 costs north of $75,000 and well done resto-mod versions are fetching $350,000 and more! I could buy a fleet of lesser, but still fun, project cars for the same money.

So what is a wrench wielding motorsport enthusiast to do to have some fun in this world without having to rob a bank? In my case, it is to crunch the numbers and pore over carsforsale.com and craigslist and eBay. It is to look long and hard at the incredibly rich waste-stream of my American society and commit to not being left behind as long as my MIG welder can strike an arc and my truck and trailer are ready to retrieve the cars and parts necessary to answer the challenge to build any of a thousand other fun car projects. 

To make this short and sweet,  I was thinking that a Volkswagen Karrman Ghia from the late 60’s – early 70’s, upgraded with suspension bits from a Porsche 986 Boxster, as well as a Porsche manual transmission coupled with a turbocharged Subaru EG33 boxer six engine all tied together with a partial tube chassis, would make a hell of a project. 

Why not start with a Boxster you might be saying, and save the hassle. The simple truth is that I want to use a chassis that is old enough to be exempt from emissions regulations so that I could have a free hand with the engine without having to worry about running afoul of the laws.

First Time Using CAD to Design a Tool

October 11, 2017 - by Matty D

In my last post I was singing the praises of drafting and computer aided design (CAD). I was particularly excited about a product called Sketchup. I was saying that anybody who builds things would be better off they were able to draw them out before the actual work begins. And it just so happened that I had a project in mind, So I followed my own advice and drew it up.

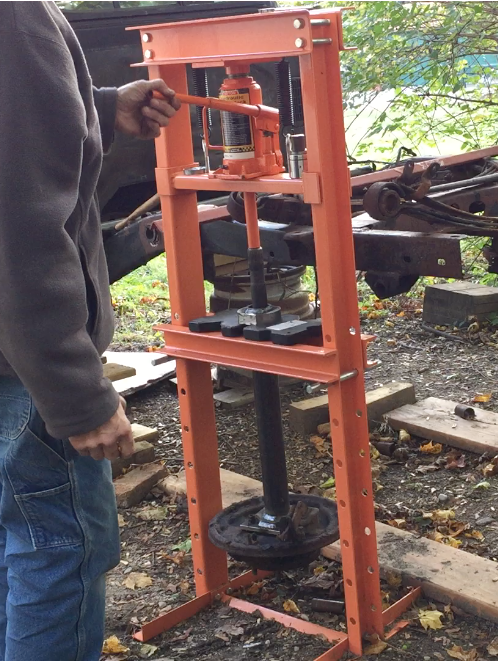
I am working on the rear axle of my 1993 Toyota 4-wheel drive pickup truck. It needs new brake backing plates. The existing backing plates are badly corroded from road salt. The backing plate is part of an assembly that consists of the axle, the wheel bearing, the backing plate and a retaining collar. The assembly is pressed together and secured with a snap ring.  In order to separate the backing plate from the rest of the parts it has to be pressed apart.

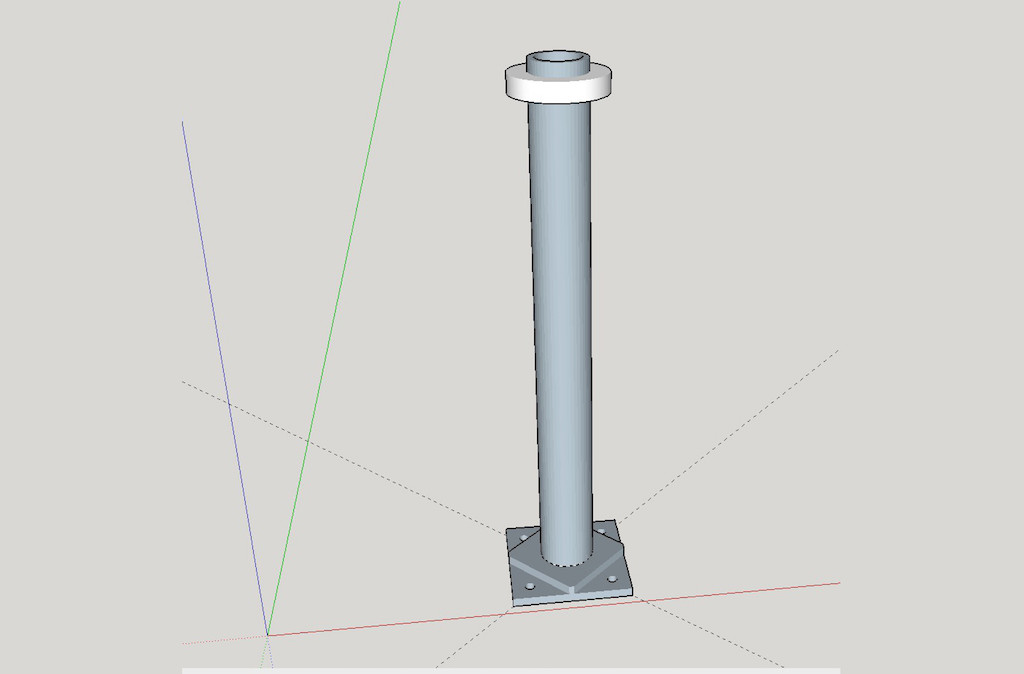
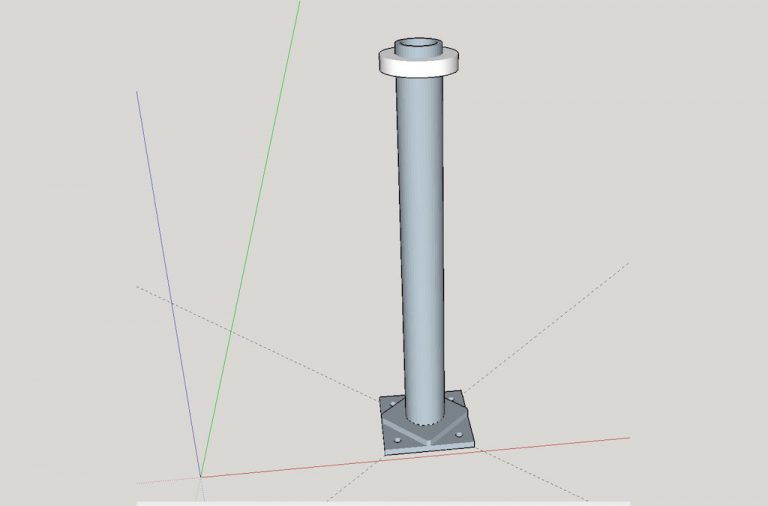
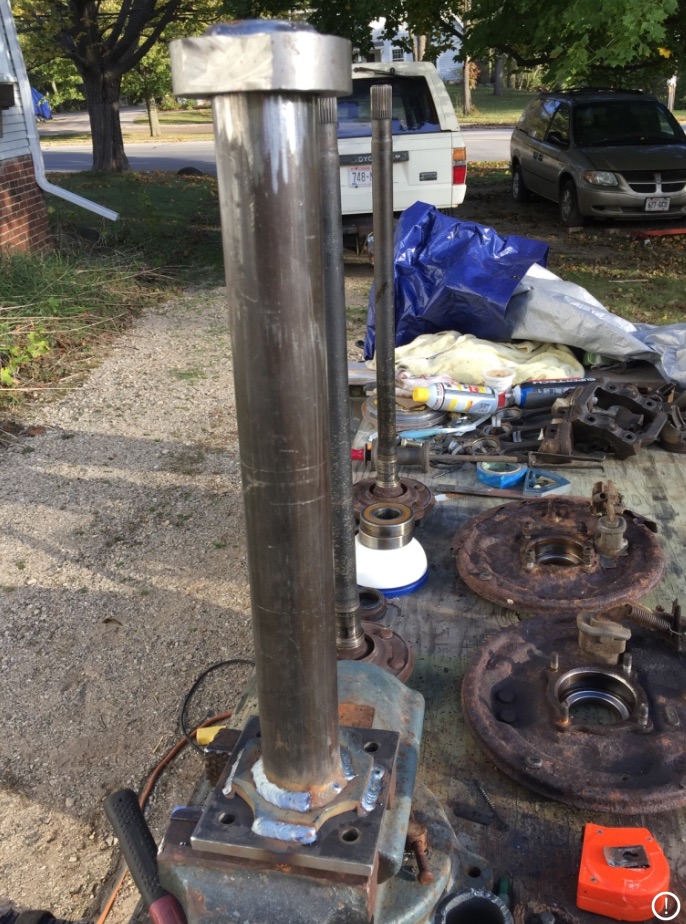
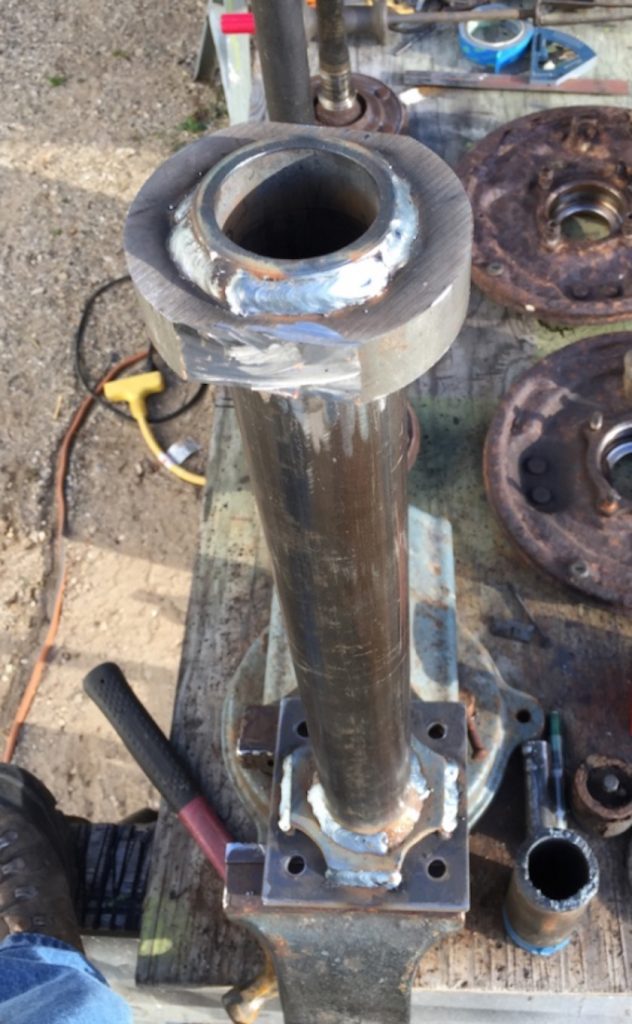
I already had a little 12-ton hydraulic press, but I didn’t have the tool. I anticipate doing more than one or two of these jobs so I decided I needed to have the tool. The first one I saw was offered on Amazon.com. A dissatisfied buyer posted pictures of the tool with a bent bottom plate. That didn’t stop me from trying to cobble together a replica of that tool from 1-1/2″ schedule 40 pipe and some quarter inch steel flat stock that I had lying around. That was a dismal failure. The quarter-inch stock was no match for the 12 ton press and neither were my welds. This got me thinking that I ought to do the job right and so I sat down at the computer and fired up the free 3-D modeling software, Sketchup.

Once I was satisfied with my drawing, I produced a materials list. The bottom was going to be made of two pieces of 3/8″ flat stock, the tube that makes up the main body would be 2 1/4 inch OD with quarter inch walls. The collar on the top that the tool would hang from in the press was made out of a slice of 3-3/4″ OD steel tube with three-quarter inch walls. I sourced the steel from speedy metals in new Berlin Wisconsin. They have an excellent Internet store for Ordering metal which you can then have shipped. They also have local pick up. I didn’t have time to drive the 80 mile round trip, so I ordered the metal to be shipped. The total bill for the steel was around $32, plus $10 for shipping

Easy to Learn 3D Design

– by Matty D –

Why You Want to Learn This Stuff

Because if you are a real gearhead and a master of skills and tools you are going to want to start building stuff from scratch (fabricating). Whether it be custom made tools and fixtures for your shop, or prototypes of things you wish to create, drawing is an important part of the process. In fact, nobody really gets into the advanced levels of fabricating without dealing with drawings.

There are two main reasons to draw. 

1. Developing your own projects for the best results.

.and2. Communicating with other skilled craftspeople.

Drawings really help the creative process. How wonderful it is to be able to build, whatever it is you are trying to create, on paper, and being free to make mistakes without the expense of ruined materials and precious time lost. In the construction field, we build houses and home additions in computer models before we ever pound a nail or saw a board. As a result we come away with very good estimates over the materials we will use and of the labor that will be required to get the work done. The same principles apply to building with metal or composites in your shop. 

And then there is communication. Communicating with other craftspeople, like machinists and welders, is much more efficiently accomplished when drawings are part of the process. Let’s say you have some metal parts that you want to have cut from steel stock using a CNC plasma system. You’re going to be way ahead of the game if you show up with good drawings in hand. If you just show up with a vague idea in your head, somebody else is going to have to translate that into hard numbers and you are going to have to pay them to do it. And if you end up owning your own CNC equipment you will have to learn to draw to be able to get the numbers to run it, or hire someone else who can.


Okay, so proper drawing, called drafting, is really hard to learn. Well yes and no. Computer aided design software has a reputation for being quite involved and having quite a learning curve, however, maybe that is changing and getting better every day. Good analogy might be website development/Creation. Once you needed to know computer languages like HTML, CSS, JavaScript, PHP, etc. To make a good website, but now there are software tools like WordPress and Elementor (both of which I am using as I am writing this) that have the software taking care of the hard work behind the scenes so the user

Shop culture is about a lifestyle devoted to lifelong learning and improvement in all areas relevant to shop work.

 Drafting, and by extension computer aided design (CAD), is one of those skills that can make us better craftsman by improving our control over our projects and increasing the ways in which we can interact with the work.

3D Computer Aided Design for Dummies

Dummies like me that is.

Drawing plans must be in my blood, because I was doing it from a very early age. Later, when I was doing serious work in residential construction, I came to see the value of stepping up from basic drawing to something more like computer-aided design. I was using drawing software, like adobe illustrator, to make drawings for things like building home additions and kitchen remodels. At first I was just trying to make nice drawings so that I could show my prospective customers what I could do for them. And it worked! When customers could visualize what was proposed they were much more likely to authorize the project. But the more I drew, the more I saw the value of the drawings for myself as the builder. I could basically build stuff inside the computer before I ever laid a hand on a hammer or a 2 x 4. I could see potential problems before I would actually have to deal with them and I could get a lot of information for my materials list, Which was crucial to knowing what my costs would be.

I am not a serious woodworker, but I am reading, with great interest, that more and more, woodworkers are using this free software product, Sketch Up Make, to build furniture in virtual reality before committing their designs to actual construction. 

I have always wanted to step up to a 3-D CAD software, But the prices were shocking and even when I took advantage of free trials, I found the learning curve to be steep and anything but intuitive. Well the folks at Trimble, the producers of Sketchup Make, have produced a CAD product that is more like a game and less like a college math class.

So I hope you noticed that I said the product is free. So there’s no reason not to give it a try. It is also extremely well supported and has a gigantic community of users. There is also an open source library of 3-D objects, things that other people have already built and contributed to the library that you can download and make a part of your drawings. And there are countless tutorials on YouTube to give you ideas and get you up and running very quickly. It’s fun and I think it can help the user to become better at whatever kind of practical project hacker he wants to be.

As Lord and High Chancellor of WrenchTech Garage I wholeheartedly recommend Sketchup Make

See how one successful woodworker used Sketchup to start a furniture making business.

For those who prefer a more traditional CAD drafting solution take a look at the free 2D solution, DraftSight, from Dassault Systems, the makers of SolidWorks, a very well respected package for 3-D modeling

WrenchTech Garage: Shopcraft as Soulcraft.

September 25, 2017 - by Matty D ///

To say that I have enjoyed making and repairing things since my earliest days would be a gross understatement. I live and breath this stuff. A day doesn’t pass that I don’t wake up thinking about workshop buildings, tools, and cars that I want to work on.

So imagine my excitement when I stumbled upon a book called Shop Class As Soulcraft.

The author, Matthew Crawford, is a University of Chicago trained philosopher, but don’t let that put you off. He is one of us. Before he got his PhD he worked in an independent Porsche repair shop in Oakland, California and made money on the side repairing vintage motorcycles.

Crawford makes the case that the work that talented craftsmen, mechanics and trades people do is not only indispensable to our economy it is also the source of a kind of practical intelligence that the world can’t do without, a kind of intelligence that keeps us anchored to reality.

Of course, we all knew that, and now science is in our corner. So working on stuff is not only good for you, it is good for the economy and good for the society. So exercise your maker brain. Get a good set of tools. Undertake some serious projects. Hang out with other folks who do the same. And read this book.

This is my roundabout way of saying welcome to my website, WrenchTech Garage. I am a residential construction pro, lifelong gearhead and sometimes woodworker who dabbles in welding, machining, composites, computer aided design and a lot more. I have two classic Toyota 4 x 4 trucks that I am restoring that are featured projects on this website. I am also working on articles and videos about many other constructive projects and tools with an emphasis on skill, determination and cunning as a substitute for money, because I’m all about getting the most bang for my limited dollars.