The Best Post on WrenchTech

Bargain Steel from My Local Recycling Business

Steel for Projects for Pennies on the Dollar

scrap_steel

August 28, 2018 - by Matty D

Wrenchtech Garage rule # 1: Don't pay retail for steel (or anything else for that matter)!

Here are a couple of pieces of steel that I picked up at my local recycling center. If I had purchased this quantity of steel at a retail steel supply business it would’ve cost more than $200! I paid about $5 for the pieces you see in the picture. One of the pieces is a fabricated part for a piece of agricultural equipment that is made up of 3/8 inch steel. The other is a piece of channel about 3 feet long and 10 inches wide that will give me a nice piece of quarter inch flat steel to work with. I need the 3/8 inch steel for some brackets that I am making for a disc brake conversion project that I’ve got going.

Wrenchtech Garage rule #2: Get what you need from the waste stream. Riches are there waiting to be claimed by enterprising. Especially in the United States, where we throw away our possessions almost as fast as we acquire them. For people who have the skills and tools the waste stream is a gold mine.

Support Wrenchtech by taking a look at products we recommend for welding and metalworking.*

Products related to metalworking:

*As a matter of full disclosure, if you purchase any products through links on these pages I stand to earn a small commission. I rely on this kind of income to keep the lights on and to keep the reviews coming. I am first and foremost a DIY enthusiast who loves wrenchin’ on cars and bikes, and making custom tools and shop equipment. I like to review products that are helpful to that end. I did not receive any free merchandise or other payments to influence my selection of products or my opinions about those products.

Metalworking has some element of risk. Always consider safety when undertaking a project. Proper safety gear is a must, including personal safety gear like eye and face protection, gloves, sturdy shoes and long sleeve shirts. Always consider the possibility that you could start a fire while welding and keep a fire extinguisher handy.

Super Low Cost Welding Machines Are Here Now!

The $139 Welding Machine! How Good Can it Be?

CR_welder

August 28, 2018 - by Matty D

S160-DR, 160-Amp Stick Arc Welder IGBT DC Inverter 115 & 230V Welding

Well actually it is pretty darn good. And when you consider that these new machines are selling for a small fraction of the cost of the European and American competition, it looks even better.

If you want to work with metal in your home shop or small business, sooner or later you are going to have to get some welding equipment. Luckily for all of us, we are living at a time in history when decent, low priced, feature packed, welding machines are easy to get and amazingly affordable. Now there is almost no excuse for not having a good machine.

Having a welding machine is a real game changer. When you get your first welder you will look back and wonder how are you ever lived without one. It is a tool that elevates your game to new levels. Without a welder you are basically a parts changer. With a welder you step into the creative world of people who make things.

Without a welder many of the jobs I do would be impossible. I like to restore, modify, and upgrade old Toyota 4x4s. Making exhaust systems, repairing frames, building bumpers, and making tools would be out of reach without a welder.  I made a custom towbar that works on several different generations of Toyota trucks and 4runners. I have repaired and modified trailers, and replaced rusted out sections of a Toyota 4 x 4’s frame. There are also little jobs that are just as satisfying. When you need a special tool, even something as simple as a crankshaft pulley holder or some custom stands to hold up an axle housing, making these things quickly and exactly to your specifications is unbeatable.

There is also the satisfaction of saving money. By sourcing metal from salvage yards and recycling centers I am often able to get steel for pennies on the dollar and often enough for free. This is the world that opens up to the person who owns welding equipment.

Enter my latest buy. I recently scored a 160 amp stick welder for the amazing price of $139! I had read the reviews and found people praising this machine for being capable of welding up to half inch thick steel. The specs said the machine had a good duty cycle and that it would be able to run on either 120 V or 240 V. It sounded almost too good to be true. After all, American and European welding equipment manufacturers are offering machines with similar features that cost roughly fifteen times as much! 

$139 was a small risk to take on the chance that this machine would really do what the published specs says it would do. So I ordered it and I have now had it for three or four weeks. I have used it to install a new crossmember in the frame of a truck that I am restoring, repaired my trailer’s jack, and I made an emergency repair on the deck of a riding mower. I have done these things and so far I have only welded while the machine was plugged into 120 V. Welding quarter inch steel with 6013 welding electrodes at around 105 Amps was no problem.

After using my low powered wirefeed welder for the last couple of years I am really impressed with the penetration that you can get with a stick welder. I also had some fear that stick welding would be hard to get back into after all these years. I am happy to report that I was able to make passable welds right away. I am not going to win any awards or get any certifications, but I am feeling more confident that some projects that I’ve been wanting to tackle, building a tow dolly, and eventually a car hauling trailer, are within the capability of this amazing $139 stick welder. On the other hand, my skills can use a little improvement, but now I have a stick welder to practice with.

In the final analysis, I have only had the welder for short a time and I have only welded with 120 volt input. Even so, I am impressed with what I’ve seen so far of this machine that I am looking forward to getting a larger selection of electrodes and hooking it up to 240 V to see what it can do. Only time will tell if the durability is there. Even if it only lasts six months or year, the total cost will be less than a couple days rental of a comparable machine. I can’t really see any downside to buying one of these machines.

CERTAIN CONTENT THAT APPEARS ON THIS SITE COMES FROM AMAZON SERVICES LLC. THIS CONTENT IS PROVIDED 'AS IS' AND IS SUBJECT TO CHANGE OR REMOVAL AT ANY TIME.
Amazon Reviews
CERTAIN CONTENT THAT APPEARS ON THIS SITE COMES FROM AMAZON SERVICES LLC. THIS CONTENT IS PROVIDED 'AS IS' AND IS SUBJECT TO CHANGE OR REMOVAL AT ANY TIME.

If you have wanted a welder and the money has been holding you back, now is the time and this is the machine.

Starting at $137.00

Shop Amazon

Shop eBay

Shop Amazon

Shop eBay

Also consider these products for welding:

Products related to metalworking:

As a matter of full disclosure, if you purchase any products through links on these pages I stand to earn a small commission. I rely on this kind of income to keep the lights on and to keep the reviews coming. I am first and foremost a DIY enthusiast who loves wrenchin’ on cars and bikes, and making custom tools and shop equipment. I like to review products that are helpful to that end. I did not receive any free merchandise or other payments to influence my selection of products or my opinions about those products.

Welding has some element of risk. Always consider safety when undertaking a welding project. Welding involves high temperatures and sparks that could cause a fire or injury. Proper safety gear is a must, including personal safety gear like eye and face protection, gloves, sturdy shoes and long sleeve shirts. Always consider the possibility that you could start a fire while welding and keep a fire extinguisher handy.

An Amazing GT Style Sports Car Bargain!

June 26, 2018 - by Matty D

One incredible car, two amazing engines!

The Lexus SC 300 and SC 400, are two versions of the same car, different only because of what’s under the hood. One is powered by the legendary Toyota 2JZGE, 3.2L in-line six cylinder, and the other, the increasingly popular 1UZFE 4.0L, aluminum, dual overhead cam, V8. 

When this car was sold initially in North America it was not as popular as it is now with enthusiasts. The in-line six from Toyota had not yet been popularized by the success of the Supra and its role in the Fast and Furious movie franchise, and the 260 hp,1UZFE V8, with its nearly total lack of aftermarket performance parts, were off the radar screens of people who normally care about such things. 

The SC 300 and the 2JZ-GE and 2JZ-GTE In-line Six

Fast forward to today, and find that the in-line six, that is shared by the SC 300, GS 300, and IS 300 from Lexus and the Supra from Toyota, has become one of the most popular tuner engines on the planet. Once people learned, from the experience with the Turbocharged Supra, that the 2J engine could stand up to about 600hp with stock internal bits, they became increasingly popular. And the fact that making 600hp with a 2J is a pretty darn easy has made this engine wildly popular with the tuner crowd. The sheer abundance of used cars with 2J engines around the globe has made them affordable as well.

1989 Toyota 4runner Project

wtg_newlogo-152x156

September 25, 2017 - by Matty D

I wasn't really planning on buying a 4runner that day

I had wanted a first-generation 4runner for as long as I could remember. So when I stumbled on this one I didn’t have to think too long before I committed to buying it. And when I say I stumbled on this 4runner I mean it was really a chance encounter. I was driving in Lake Geneva on my way to Home Depot, to get some materials for a job that I was working on, when out of the corner of my eye, I saw this forlorn, hard used, rattle can paint job wearing, little truck sitting on the edge of a condo complex parking lot. I whipped a U-turn…


1993 Toyota Xtra Cab, 4×4 Project

September 25, 2018 - by Matty D

A Little Background

Crazy as it may sound, buying this truck will be a real step up for me. I have owned several earlier generation Toyota trucks in the past and absolutely loved them. This generation of truck was reputed to be a substantial improvement over those trucks, so I am looking forward to step up to a 25 year old truck! What can I say, I am a Toyota diehard.

This is a Wisconsin truck that I picked up with only 115,000 miles on the odometer and a blown engine (the infamous 3VZE, 3.0l V6). A rod broke and punched a hole in the side of the block right behind the A/C compressor. The truck has the DLX trim package and a 5-speed manual transmission. It looks good in this picture but it has some rust as you would expect from a 24 year old truck that has spent its entire life in the Milwaukee, Wisconsin area. It needs a new hood, tailgate and rear bumper. The driver’s side cab corner needs a small amount of rust repair. The frame is solid, except for the tubular crossmember that holds up the rear of the gas tank. The leaf springs and the driveshafts will clean up nicely and I have already secured new used control arms and torsion bars for the front suspension. The rear axle housing is getting sandblasted and will have the drum brakes replace in favor of a custom disk brake set-up. And last, but not least, The engine needs to be replaced.

It sounds like a hell of a lot of work, but I think on balance there is enough good about this truck to justify saving it. I think the picture above supports that proposition. And for me, working on these Toyotas is as much fun as it is work.

The Work Begins

I started by pulling the engine out. It was my first time working with the 3VZE V6. It is a little more of a handful than the more compact 4 cylinder engines I had been working on and so I had a little apprehension about doing the work. I didn’t need to worry, it came out like a dream. First, I stripped off the accessories, the radiator, the PS pump, the A/C comp, the alternator, the exhaust manifolds and the intake ducting. Then I disconnected the driveshafts, the transmission crossmember and unbolted the motor mounts. I put color coded paint markings on all the vacuum hoses, disconnected the wiring harness at the computer and the engine, transmission and transfercase were ready to be lifted out as one unit. Using an adjustable lifting sling and a hydraulic cherry picker hoist, I was able to get the combined assembly out without any trouble at all.

My Thirty Years of Toyota 4×4 Ownership

WTG Blog

31 Years of Toyota 4x4 Ownership

me_mattyd_transparent_bg_100x105
me_mattyd_transparent_bg_75x79

June 19, 2018 – by Matty D

I have owned one Toyota truck or another continuously since 1987 and I am looking forward to owning many more, including FJ60 and FJ80 Landcruisers and the newer 4runners. Here is a rundown on what I have owned so far:

My first Toyota 4x4

In 1987, I purchased this 1982, long bed, pickup. I bought it from a salvage yard in Wilmington or San Pedro, near the Port of Los Angeles. They specialized in Toyota salvage. It had been in some kind of accident, but it came with a clean title. A spot welded seam on the transmission tunnel had come slightly apart, which made me think that the truck had been hit hard. The price was cheap enough to allow me to disregard any doubts I may have had  and go ahead and buy it. That truck road nicely and never gave me a problem as long as I owned it. When I finally sold it in 1990, the buyer, a guy who was visiting from Oregon, also noticed the seam and asked me if I knew anything about it. I told him I thought it had been in a wreck before I bought it and that it hadn’t give me any trouble. That was enough to satisfy him. He became the third owner of the tan colored 1982 Toyota pick up truck.

My Second Toyota

In 1990 I got a dark metallic gray 1984 Xtra Cab 4×4 pickup. This is the truck that really sold me on Toyota trucks. It was pretty much my daily driver from 1990 until 2010. I bought it in California and drove it there for a few years before bringing it to Wisconsin. This was an unfortunate turn of events, because what was once a perfect, never driven in winter, original California truck would eventually be destroyed by extensive rust in both the body and frame.

Getting an old Toyota truck to last for 17 years in the harsh Wisconsin rustbelt conditions was no easy task either.

In 1999, I installed a nearly perfect bed that I picked up at a wrecking yard in El Paso Texas. I know it was an Arizona bed because it came with an Arizona license plate attached. I still have that license plate. By 2005 the rear sections of the frame were in desperate need of repairs. I welded in new sections and got five more years of service out of the truck, but by 2010 the rust had returned and spread even farther. The cab corners were also rusting through and there were leaks in the firewall that caused water to drip onto the floor by the drivers feet. The Arizona bed I installed in ’99 was also in pretty bad shape after ten years on the Wisconsin roads. Finally in 2010, the frame rails that I had repaired started to give way. I had gotten 20 years of transportation and enjoyment out of the old truck, but things had gotten to the point where it it was time to put the old Yota into retirement.*

A big part of the enjoyment of ownership came from the upgrades I made along the way. In 2004, I scored one of the legendary R151F turbo transmissions with matching 23 spline transfer case. I bought it from a wrecking yard in Reno Nevada and had it shipped to me in Wisconsin. I paid $400 for the combination. When parting out the remains of the truck 10 years later I was able to sell the transmission and transfer case for $850! I had sold the 22RE/R151 bellhousing a year two before that for $200. That was certainly one of the best investments I’ve ever made. I also upgraded the brakes with superior parts from the Landcruiser part catalog. I put a wider rear axle in, some 1992 Celica GT seats and I upgraded the engine to the 22RE spec, including a full electronic fuel injection upgrade.

I have to say that the 1984 SR5 Xtra Cab 4×4 was the most satisfying car ownership experience I have had in my life so far.

#3 and current: 1989 4runner SR5

This is how my 1989 runner looked when I brought it home. Kind of rough, but I figured I was just the man to try to save it.

A few years ago, as I was driving to Home Depot to get some lumber for a job I was doing, when out of the corner of my eye I saw this 4runner on the edge of a condominium complex parking lot. You don’t see many first generation 4runners in Wisconsin these days. If they started their lives here, they’ve rusted away and been sent to the crusher a long time ago. I had wanted one for many years and so I had to take a look. I got closer and yes there was a for sale sign on it! I parked my 1984 Toyota extra cab 4 x 4 and got out to get a closer look. It was a little bit rusty in the quarter panels and the front fenders, but I noticed that the hood, the doors, and the tailgate were pristine. The came the clincher. I don’t know what possessed me, but I took the key to my ’84 pickup and put it in the door of the 4runner and it turned! I looked around me to see if anyone was watching. It seem like nobody was, so I slid into the driver’s seat and put my key in the ignition, it also turned with my key and the dash lights came on. I did not dare to crank it over though. I had already gone too far. I quickly exited the vehicle and locked the door. It seemed like I was destined to own that 4runner and so I wrote down the phone number, and the rest is history.

#4 and current: 1993 Xtra Cab DLX

I bought this one off a Craigslist ad. It wasn’t running. Later I discovered that the enging had broken rods and a hole in the block. I am currently preparing a replacement engine and doing some rust repairs. I am replacing a lot of parts on the underside. Among which are, new rear leaf springs, axle housing sandblasted and painted, new driveshafts, new control arms, new torsion bars, and a new exhaust system. Right now, I am going through a used replacement engine. If it checks out, it will get new rod and main bearings, a new timing set, oil pump, water pump and some remanufactured fuel injectors.

 These trucks are ideal candidates for an engine upgrade, so I’m looking at my options for a future engine swap. Two that interest me right now, are the 2014 Chevrolet Ecotec LV3, 4.3 L, an all aluminum V6 with 285 hp and 300 pounds feet of torque, and the Volkswagen 2,0 L TDI diesel, model BHW, out of the 2004-2005 Passat. It will put out 180 hp and 325 lb/ft of torque with nothing more than reprogramming the ECU. The thought of a 30 MPG daily driver truck as good-looking as this is quite attractive.

A Pair Of Parts Trucks That I Picked Up Along The Way

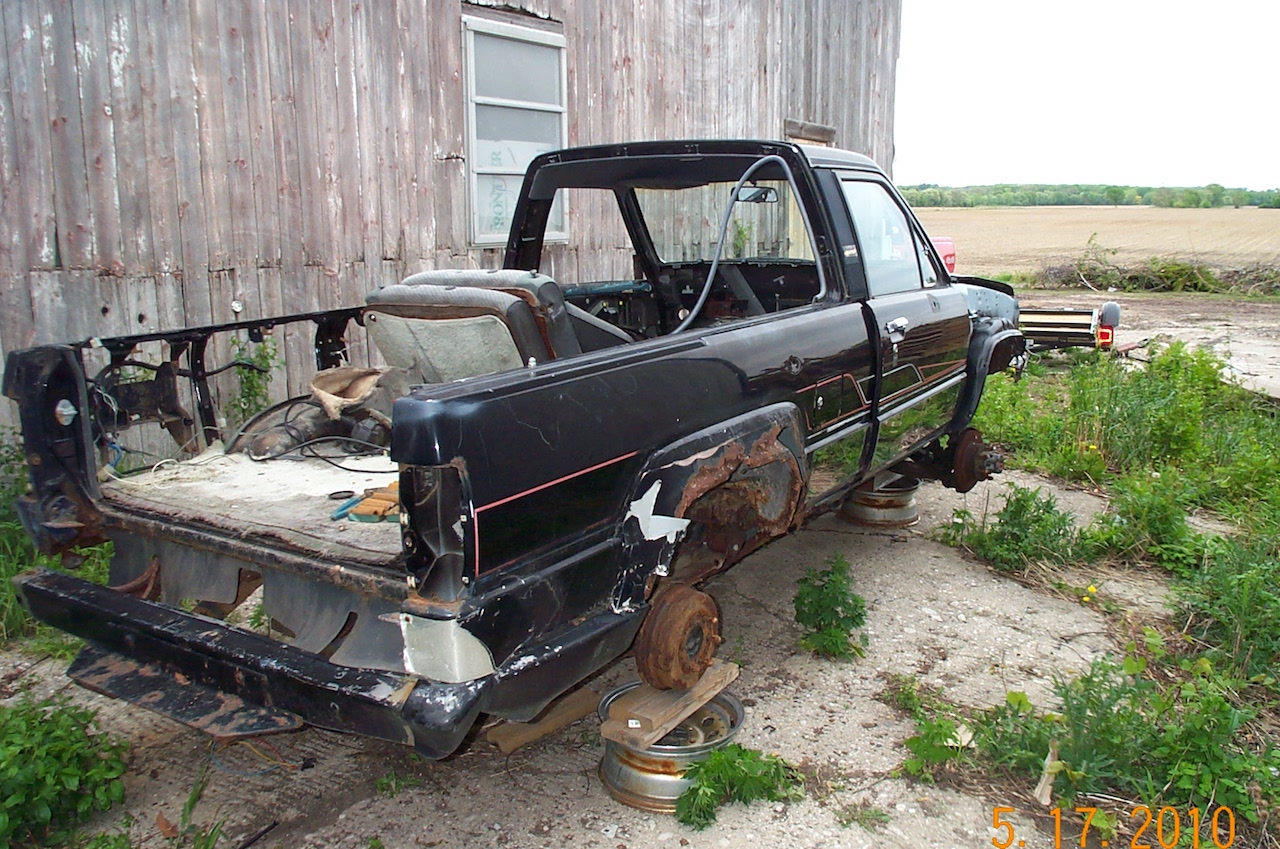
I have owned two Toyotas that were purely for parts only, in 2006 I bought a rusty 1989 4runner for $500. A few years later I traded a little bit of yard work for an also rusty 1988 4runner.

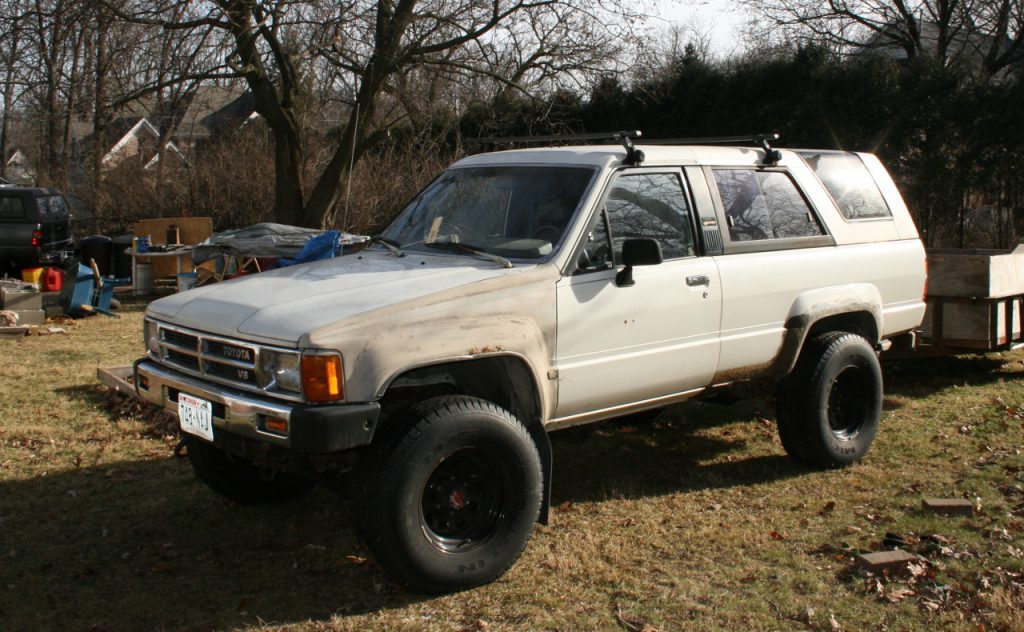
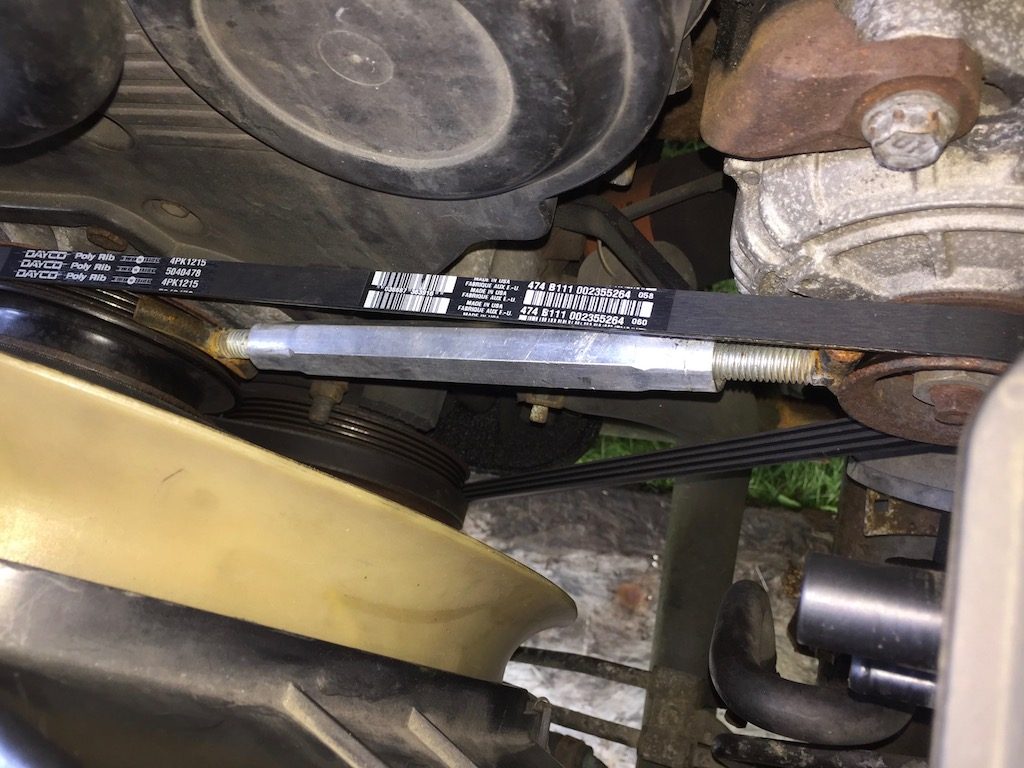
1989 4runner SR5 22RE Auto

I like to think of that old, rusty runner as the gift that kept on giving. Not only did I get an entire fuel injection system and all the supporting parts to upgrade my 1984 Xtra Cab from carburetor to fuel injection, I also got air conditioning and I swapped the narrower back axle in the pick up truck with the wider axle from the 4runner, and in the process got a slightly lower gear ratio, which was a welcome benefit. Now I had a transmission with a lower first gear and a lower gear in my rear differential. I was also able to sell the automatic transmission that came with the 4runner for a small amount of money.

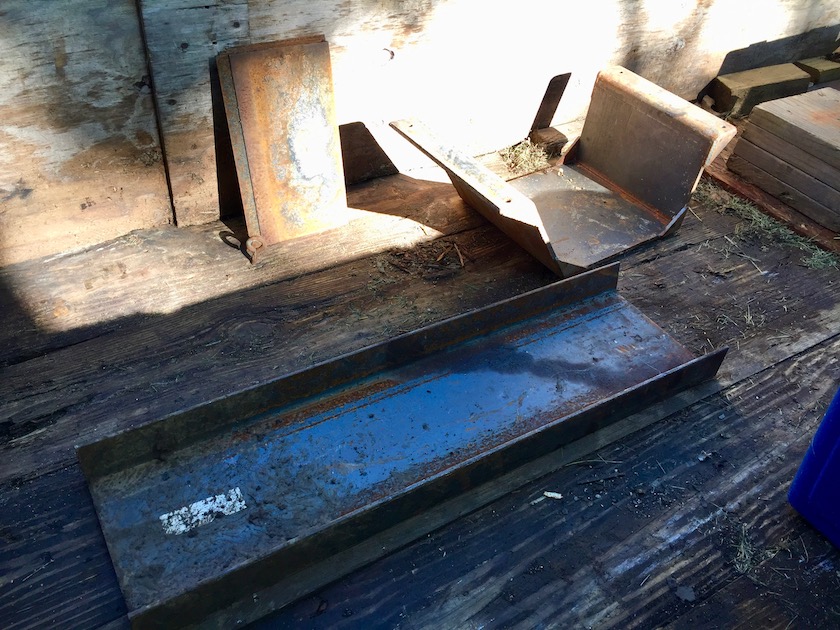
When I was finally done pulling parts off of it,  I cut the quarter panels off, like I was going to re-skin them. I did it for practice so that I would be better prepared if I ever did a full quarter panel repair job. Then lastly, I took the vehicle completely apart down to the last nut and bolt. I feel like I got quite a bit for my $500 investment in the 4runner.

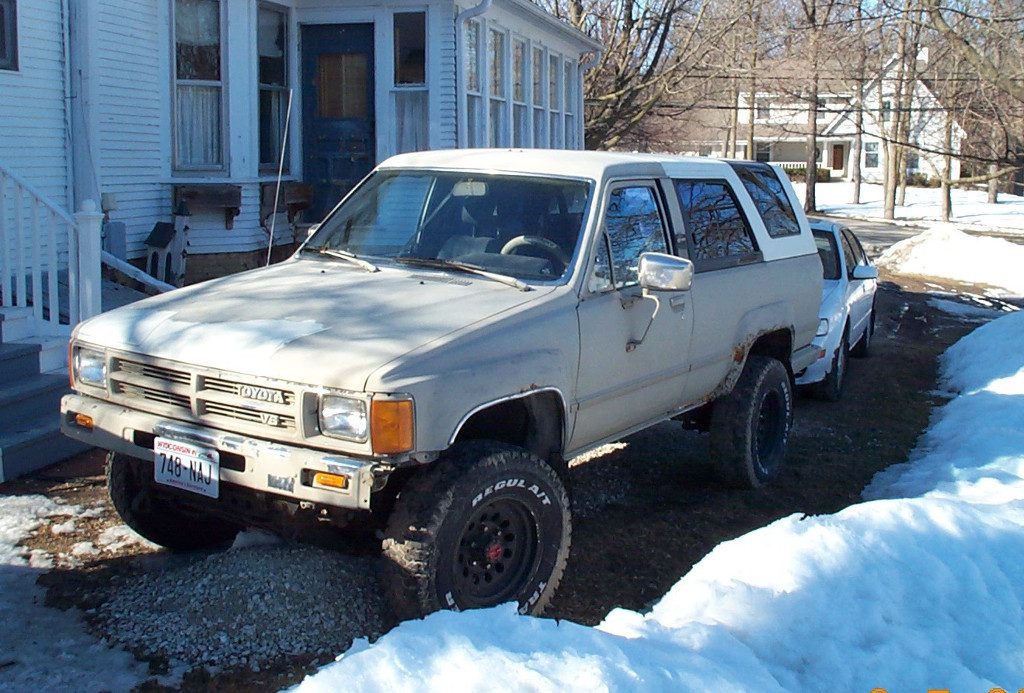
1988 runner SR5 3VZE 5 spd

This vehicle was abandoned by a realtor friend’s son, who left it on her property when he moved away. She asked me to clean up her yard and said that I could have the 4runner as payment. I spoke with the son by phone and he said he was okay with the deal. He also said that he could not find the title and asked if I would be okay taking the vehicle without it. Since it was fatally rusted in the frame and pretty extensively rusted in the body, I knew that this vehicle would never be on the road again and so it was no problem for me. 

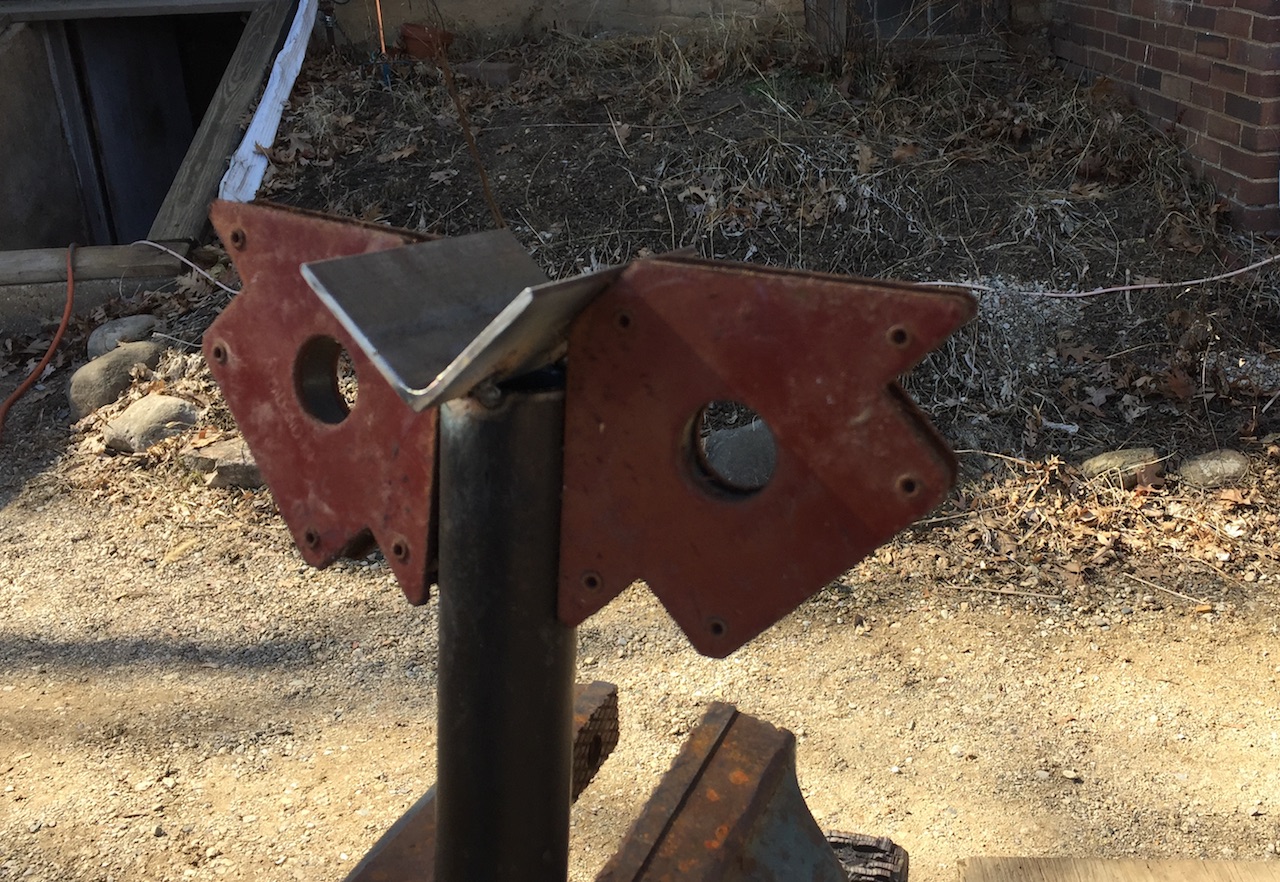
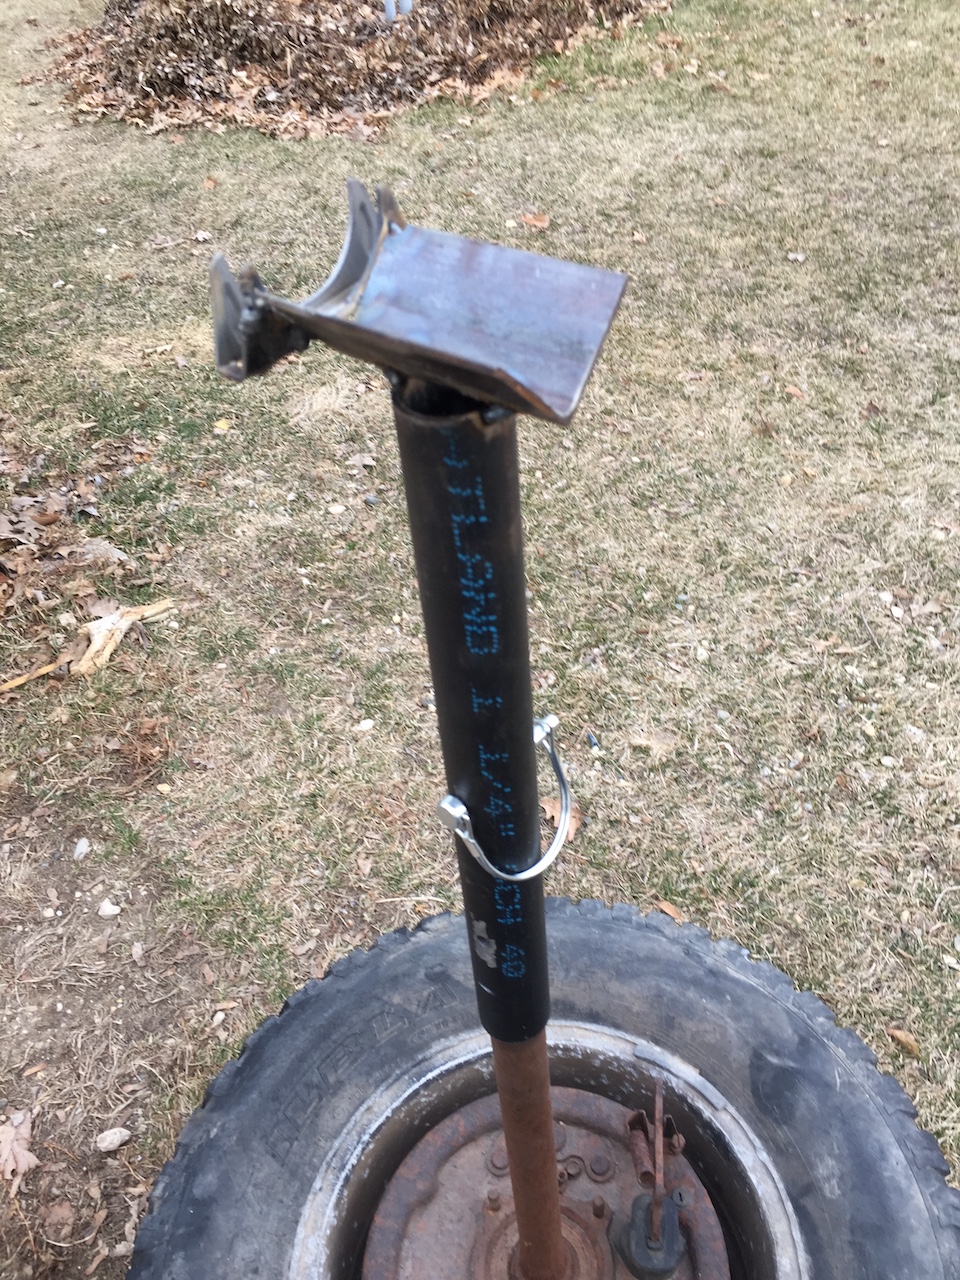
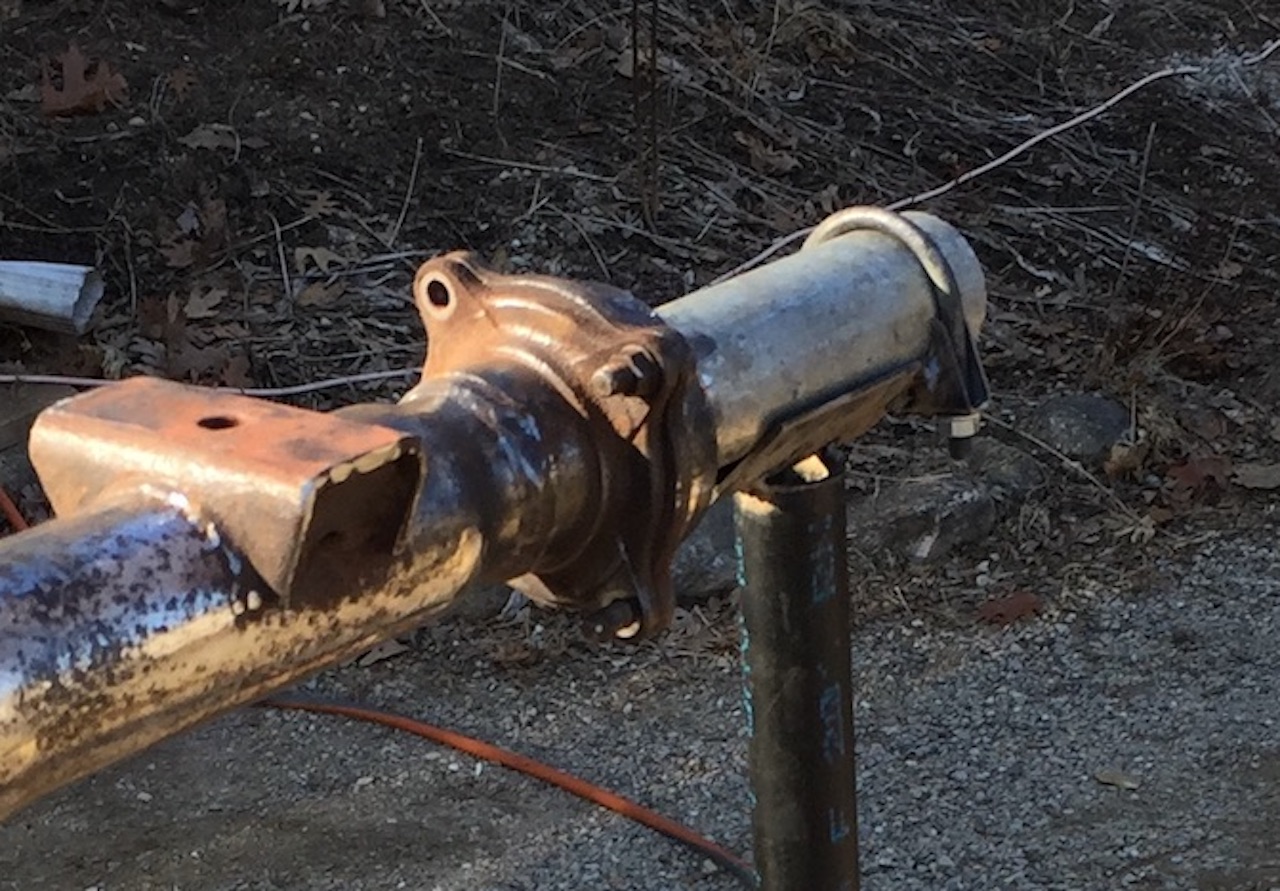
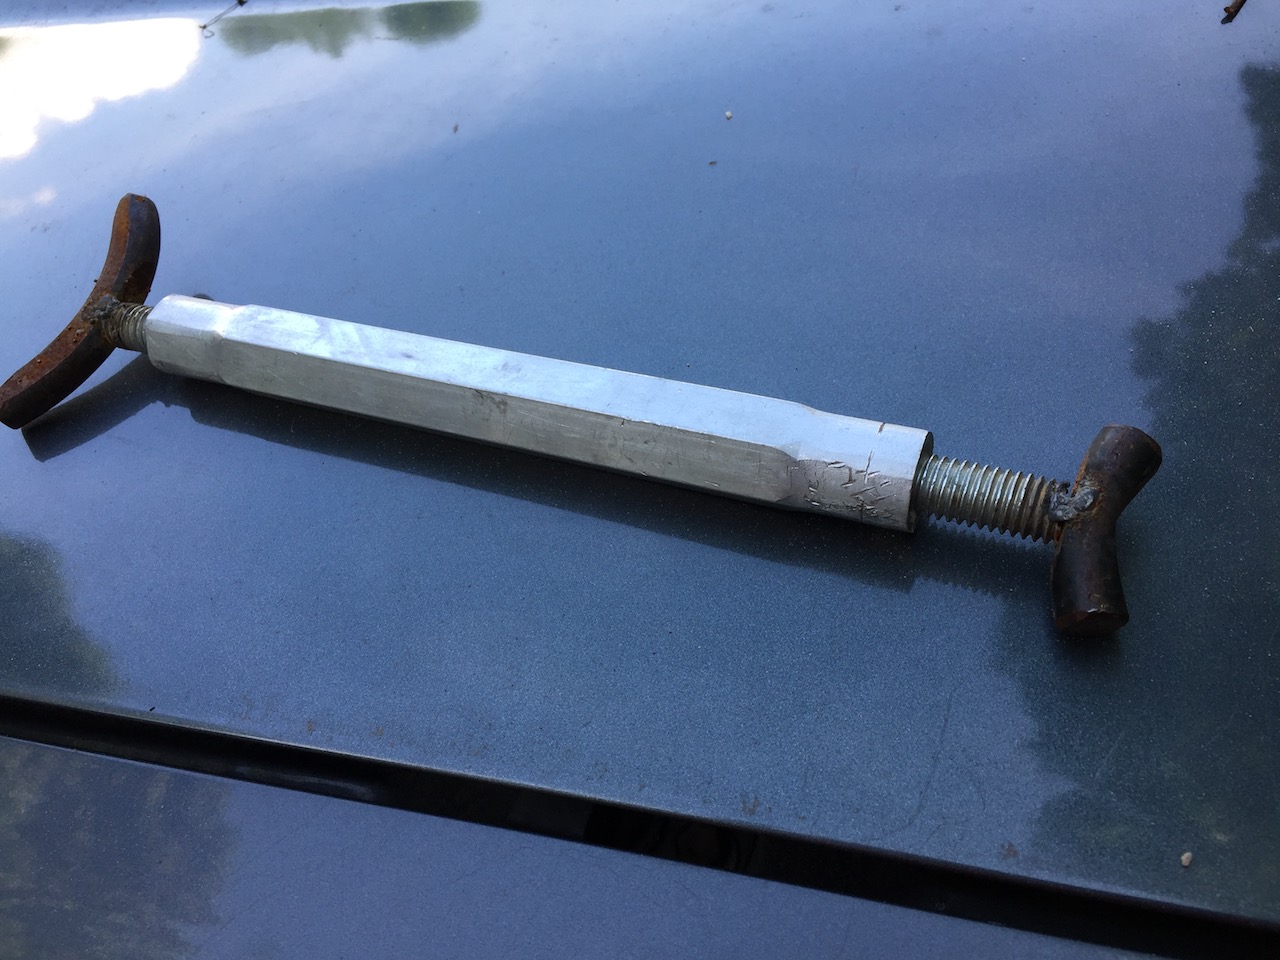
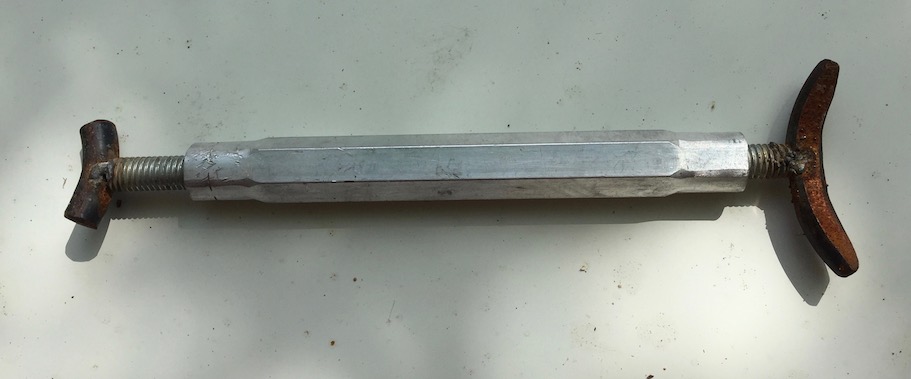
The only way for me to get it back to my storage area was to flat tow it with the towbar that I made to bring home another 4runner that I acquired a few years earlier. Before I could do that though a few problems needed to be addressed. First off, the prior owner had taken one of the front hubs for use on another Toyota that he had. Secondly there were no wheels or tires for the front or the back of the 4runner. These problems were pretty easy for me to address. I had a couple extra hubs sitting on a shelf in my garage, and rounding up four Toyota wheels with tires wasn’t a big deal either. So I showed up with my 84 extra cab, the towing bar, an IFS hub with bearings and mounting hardware, four wheels with tires and lugnuts, and some magnetic mount towing lights.

It was pretty satisfying to get this vehicle back up on some wheels and see that it was going to go down the road without any problems. The drive was 10 miles back to my storage. The 4 cylinder 22RE powered 1984 Xtra Cab 4 x 4 had no problem towing the 3500 pound 4runner. The 4runner came with expired license plates which I figured would probably be good enough for towing it that short distance. And we are out in the country, so taking back roads was a pretty good guarantee that I wouldn’t run into any law-enforcement issues. I did have the property owner provide me with a signed Bill of Sale that might have been useful if we were questioned. But of course, rusty old Toyota trucks don’t figure in most people’s minds as something worth stealing. 

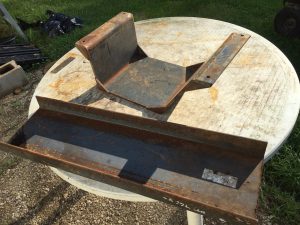
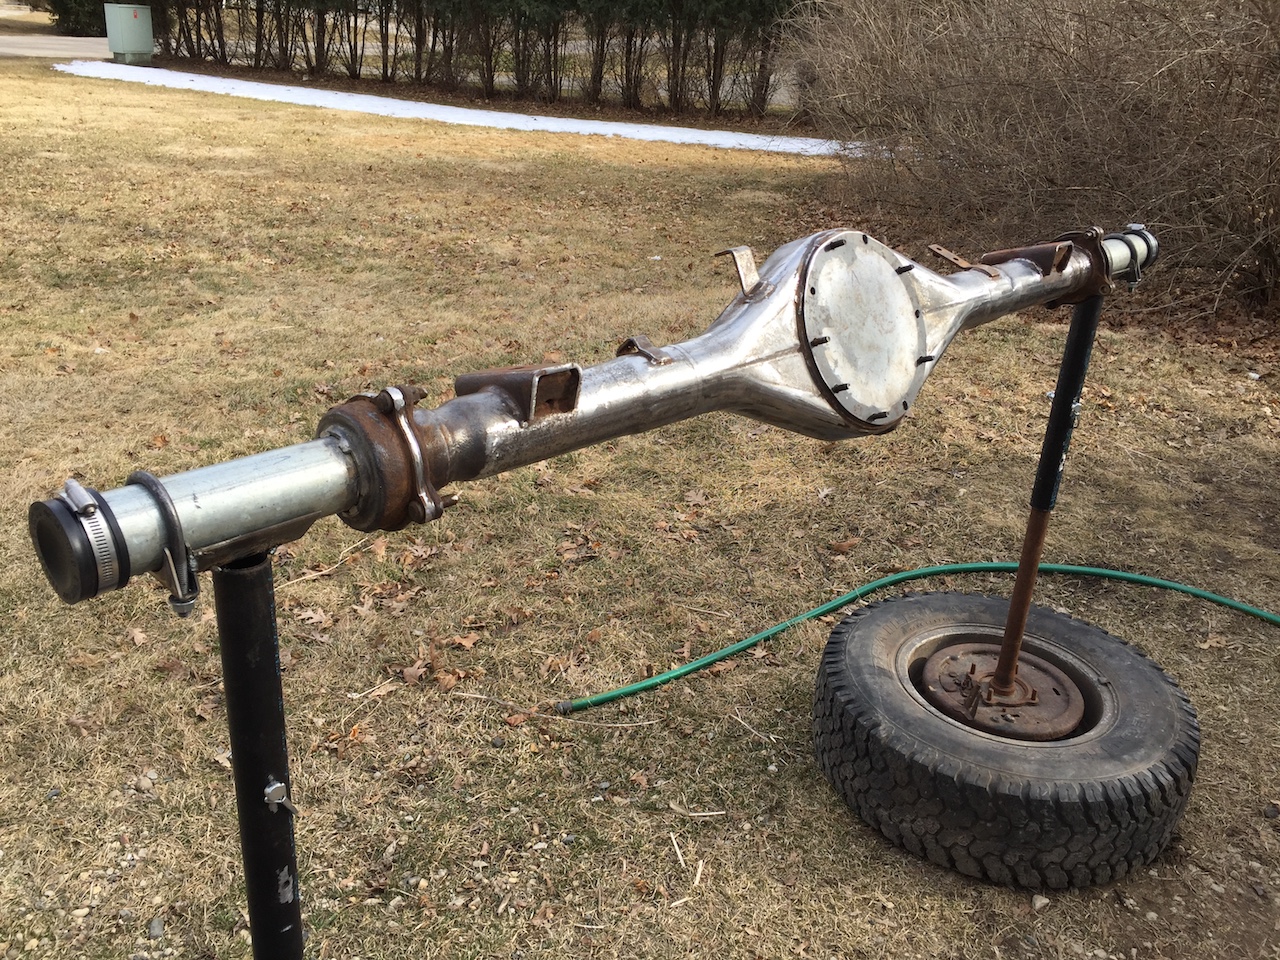
So what became of this rusty old 1988 4runner? As of June, 2018, I still have it sitting at my storage, which is an area between two barns on a friend’s farm. I yanked the engine out pretty soon after I got it. I was going to rebuild it and put it into my 1993 extra cab, but after I pulled it out I decided that the block was too rusty to be worth rebuilding. I did use the cylinder heads though as exchange cores when I purchased a pair of new heads. I also saved the R150F transmission and transfer case for a future project yet to be determined. The rear axle housing is pretty rusted and has a 4.10 gear set, which makes it pretty uninteresting. What is interesting though, it Is the SR5 instrument cluster, the interior wiring harness, including wiring for the back window (a couple years ago I grabbed the rear window relay box for my 1989 4runner). The fiberglass top was damaged buy some debris falling off the barn a couple years ago but it still has a pair of good quarter windows with decent trim that I am going to use to restore another top that I have. My plan is to have three tops for my white ’89 4runner, white hardtop, black hardtop and soft top (color yet to be determined, maybe tan).

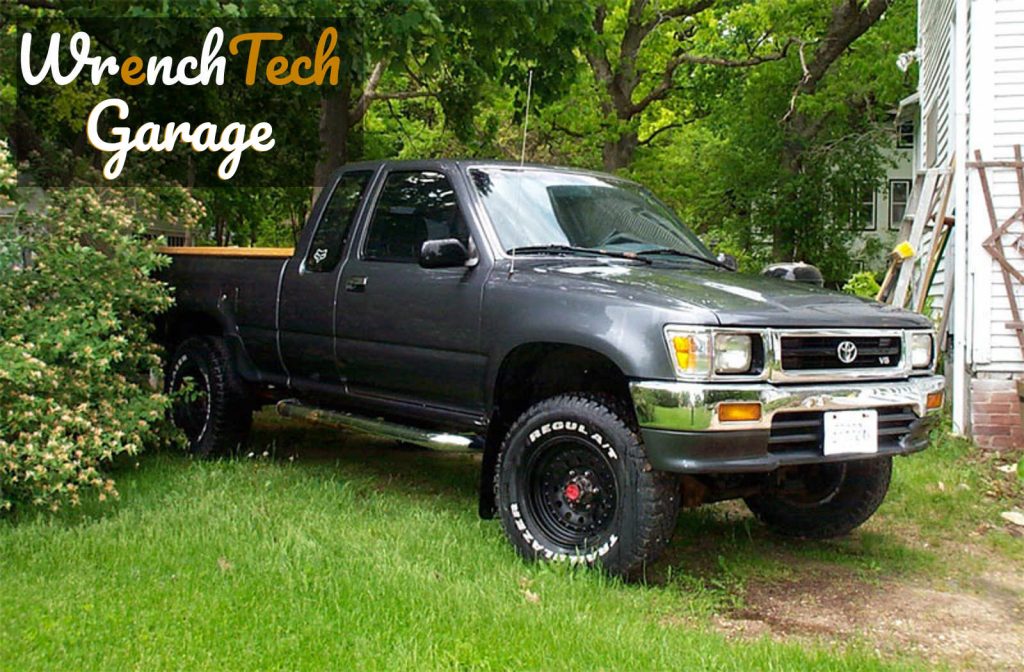
There isn’t a panel on the vehicle that is rusted beyond redemption, except for the passenger side door, which seems to be perfect, and the hood which only has a small spot of rust on the underside. Those parts , along with the SR5 instrument cluster and the R150F transmission, are going to go into the restoration of my 1984 extra cab.

Toyota Belt Tensioning Tool: Made in the Wrenchtech Garage

June 17, 2018 - by Matty D

If there is anything that I like better than using tools, it is making tools. Even the simplest tool, thrown together in a few minutes, gives me great satisfaction. I felt that satisfaction again today as I used my homemade belt tensioning tool to help me solve a squealing belt problem that had developed on my 1989 4runner. Many times in the past I resorted to wedging a prybar between the engine block or the timing cover and the alternator to try to lever it over to get tension on the belt. Working on my first generation 4runner I just couldn’t find away to make those crude methods work, and so I constructed a tool.

It’s about a simple as things get. I went to the local hardware store and bought a 10 inch turnbuckle. Most hardware stores have them. They consist of a threaded collar that forms the body of the turnbuckle and a pair of screw eyes, one at each end. One of the screw ends has a reverse thread. This allows the turnbuckle to become longer or shorter when the body is rotated. If both had a conventional thread the collar would simply move along the threads without changing the length of the turnbuckle. By having two different threads, turning the collar causes each threaded eye to move out of the collar or go deeper into into it depending on which way the body is being turned. 


This
Into This

I cut the eyes off the turnbuckle ends and welded some curved sections of steel that I cut out of a junk coil spring that I had. The shorter section goes up against the alternator pulley and a larger section pushes against the crankshaft pulley. Once the tensioner tool is in place I simply turn the collar by hand, causing it to spread out and push the alternator away from the crankshaft. The collar has a hexagonal shape with flat surfaces to grab with a wrench, but I have never had to use a wrench. I’ve always been able to get sufficient tension on the belt just by turning the turnbuckle sleeve by hand. To finish up I just tighten the alternator bolts before releasing the tension tool. 

My custom-made tool works like a dream. It goes into place easily, fits snugly and only takes a few seconds to set the tension. I have a long list of tools still to be made, so please sign up so that I can send you an email when the next project starts.

I Feel a Sandblaster Project Coming On

March 24, 2018 - by Matty D

March 24, 2018 - by Matty D

Pictured above is an abrasive blaster that sells for about $600 at Northern Tool (and about a million other places). I have a 40 pound propane tank and a set of wheels that would give me a good head start on the materials that I need to make my own version. Some parts that I would need to buy would include a deadman valve/blast gun/nozzle holder, some blast hose, assorted pipe fittings and valves, a water separator, and a pressure relief valve.

Blast hose is the most expensive item, running about $10 a foot. A deadman style blast gun would run about $55. I figure I might have $250 or $300 into the entire project by the time I’m done. In any case, after calling around to get some prices for sandblasting services, I can see that this thing will pay for itself in no time.


A DIY Stand And Holder For Axle Housing Work

march 23, 2018 - by Matty D

There is no sense in struggling with big awkward items like axle housings when it’s fairly easy to make tool or a jig to do the job. I wanted something to hold these housings while I clean them up and paint them. I had a pair of old style short Toyota truck axles that I had been planning to make into some kind of stands that looked perfect for this job. I bolted them to a pair of wheels and then realized that I needed some extensions to make them taller. I also wanted to create some saddles for the housing to rest on, and of course, some way to attach the housing so I could lock it down in different positions while I am working. I also want to be able to cover the axle housing openings so that I don’t get grit and debris inside.

I think I made a solution that meets my needs. I used mainly scrap metal and junk auto parts so it only cost me about $8. In a world where everything is getting pretty spendy I am pretty pleased with the results and the ultra low cost.

If you keep following my posts you will see that I am all about getting maximum fun for minimum dollars. An idea that I put that idea into practice at every chance.

The Working Man’s Porsche: The 986 Boxster

WTG Blog

A Porsche for the Working Man:
The 986 Boxster

January 12, 2018 - by Matty D

In my previous post, I was getting enthusiastic about the old Volkswagen Karmann Ghia as a possible platform for wrench hacking. I consider it a candidate for an epic project click text because the styling, especially when viewed from the rear, is timeless. and because it seemed to share dimensions and heritage with later cars like that Porsche 914 and the Boxster 986. I also like the idea of working on a project vehicle that is old enough that it would not be subject to emissions inspections. In other words, you could do a crazy engine swap and still be able to license it in California.

Well, my enthusiasm dwindled when I saw the prices that Volkswagen Karmann Ghias have been commanding in recent months. If I had $15,000 available to purchase a project vehicle and my choices were $15,000 for a Karmen Ghia, or $15,000 for a Porsche 996, or $5000 for a Boxster, I think that I do not love the Karmann Ghia as much now.

As you may remember, my engine of choice for the Carmen Ghia project was the Subaru EG-33 flat six. To have a free hand to modify that engine to its potential you would want a project vehicle that would be exempt from inspection.

As I turned my attention away from the Karmann Ghia and towards the two Porsches, I knew that I would have to abandon the Subaru lump and embrace the Chevy LS engine, if just for the fact that it could be made to pass emissions testing in either of these two chassis and still be producing good power.

In any case, my goal now is to try to find either:

A Porsche 996, which is an iteration of the venerable 911 series, a rear engine configuration true to the time-tested formula that has made Porsche famous,

or

A Porsche Boxster 986, the young upstart of the Porsche family which employs a mid-engine configuration.

The 996 is presently the least sought-after 911. It is too new to be a classic and it has had the misfortune of having been the first 911 to bear a water cooled engine. And then there were some styling issues having to do with what has come to be known as the “fried egg” headlight design. All of these factors combine to make the 996 the most affordable 911 currently in the market. Just how bad is the 996?


Not that bad, right?

And it can be really stunning with the right body panel upgrades.

Of course, a serious wide-body conversion isn’t a poor man’s game, but skill, tools and a large measure of devotion can go a long way where money is short. And a decent 996 coupe with a manual transmission is going to set you back about $15,000 for the C2 and $17,000 for the C4 (the all-wheel-drive version). A budget-minded wrench-hacker would be smart to look for an example with a blown engine, which might be purchased for less than $10k.

The most affordable Porsche, however, is clearly the Boxster which began its series in 1997 with the 986 designation. This budget Porsche is the car that may have saved the Porsche automobile company by creating a new more affordable Porsche with a broader market appeal. Although it may cost less than its predecessors, the Boxster and its hardtop version, the Cayman, which arrived in 2005, have proven themselves to be genuine sports cars worthy of the Porsche name.

2002 Porsche 986 Boxster S

And here is where things get really interesting. An early example might only be worth $6000. If it has an engine failure its value may drop to near zero because an engine replacement might cost more than the vehicle is worth. Of course, it would have part-out value and there would likely be independent mechanics or enthusiasts who would want to buy the vehicle and repair it themselves or use it for an engine swap project. So expect the vehicle to sell for $2000 or $3000 dollars even with a bad engine. That would not be a bad price for a project car that could fairly easily be re-powered with a Chevy LS engine, a swap that has been well worked out, has good support and which makes neat, well-balanced package. The car is already so good, especially if you get the upgraded “S” version, that with a few basic suspension tweaks, some attention to the brakes, wheels and tires and somebody panel enhancements you could be rocking at a super car level. 

Boxster w/body kit
Porsche 986 (1998 - 2004) w/Techart Body Kit