An Amazing GT Style Sports Car Bargain!

June 26, 2018 - by Matty D

One incredible car, two amazing engines!

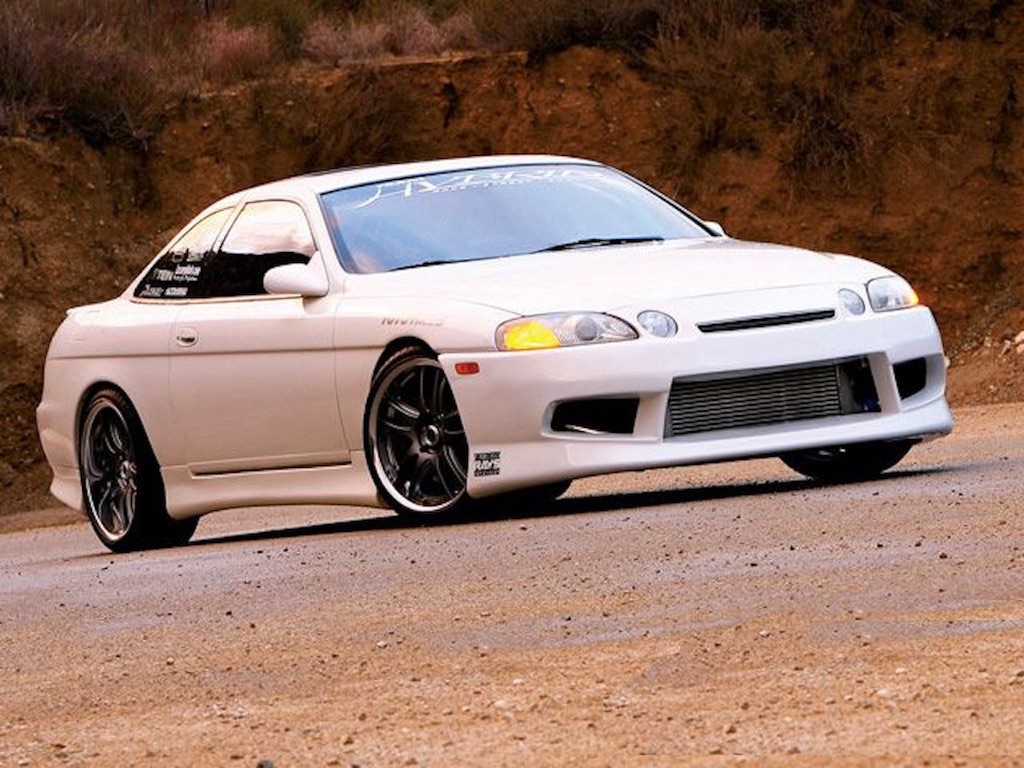
The Lexus SC 300 and SC 400, are two versions of the same car, different only because of what’s under the hood. One is powered by the legendary Toyota 2JZGE, 3.2L in-line six cylinder, and the other, the increasingly popular 1UZFE 4.0L, aluminum, dual overhead cam, V8. 

When this car was sold initially in North America it was not as popular as it is now with enthusiasts. The in-line six from Toyota had not yet been popularized by the success of the Supra and its role in the Fast and Furious movie franchise, and the 260 hp,1UZFE V8, with its nearly total lack of aftermarket performance parts, were off the radar screens of people who normally care about such things. 

The SC 300 and the 2JZ-GE and 2JZ-GTE In-line Six

Fast forward to today, and find that the in-line six, that is shared by the SC 300, GS 300, and IS 300 from Lexus and the Supra from Toyota, has become one of the most popular tuner engines on the planet. Once people learned, from the experience with the Turbocharged Supra, that the 2J engine could stand up to about 600hp with stock internal bits, they became increasingly popular. And the fact that making 600hp with a 2J is a pretty darn easy has made this engine wildly popular with the tuner crowd. The sheer abundance of used cars with 2J engines around the globe has made them affordable as well.

1989 Toyota 4runner Project

wtg_newlogo-152x156

September 25, 2017 - by Matty D

I wasn't really planning on buying a 4runner that day

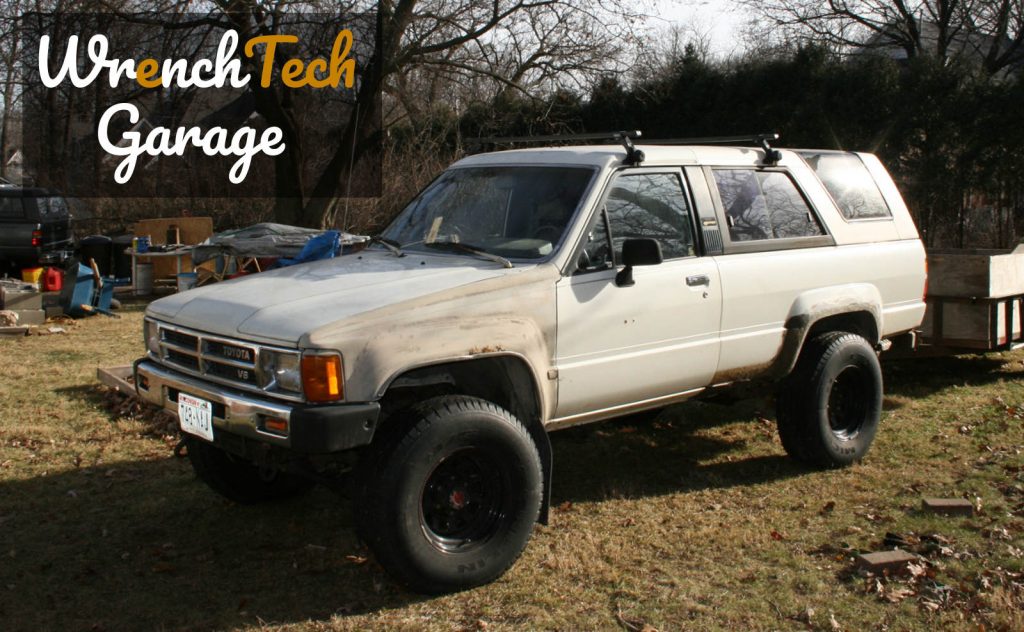
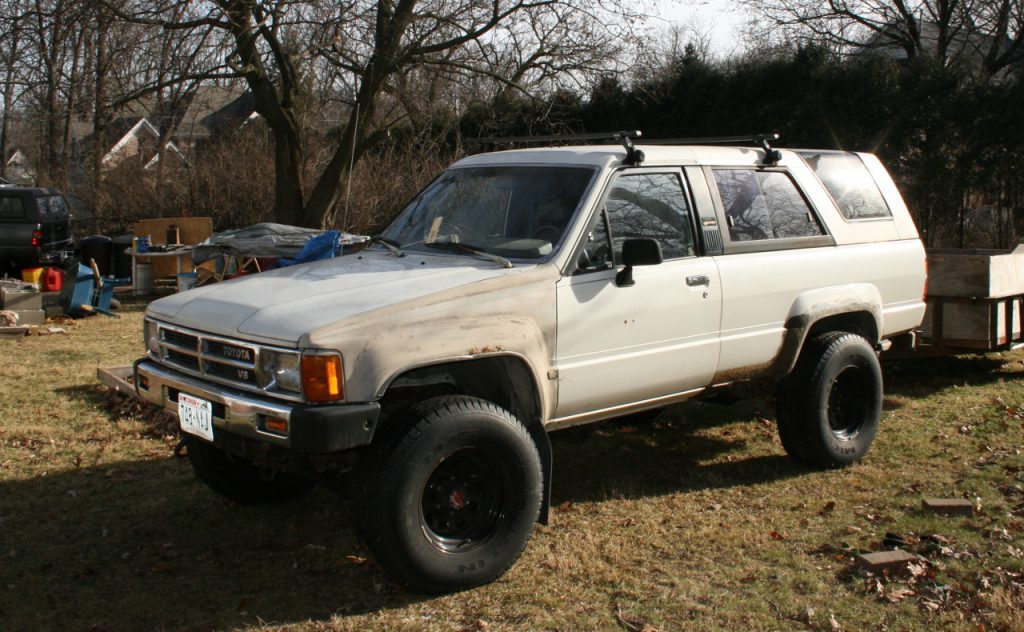
I had wanted a first-generation 4runner for as long as I could remember. So when I stumbled on this one I didn’t have to think too long before I committed to buying it. And when I say I stumbled on this 4runner I mean it was really a chance encounter. I was driving in Lake Geneva on my way to Home Depot, to get some materials for a job that I was working on, when out of the corner of my eye, I saw this forlorn, hard used, rattle can paint job wearing, little truck sitting on the edge of a condo complex parking lot. I whipped a U-turn…


1993 Toyota Xtra Cab, 4×4 Project

September 25, 2018 - by Matty D

A Little Background

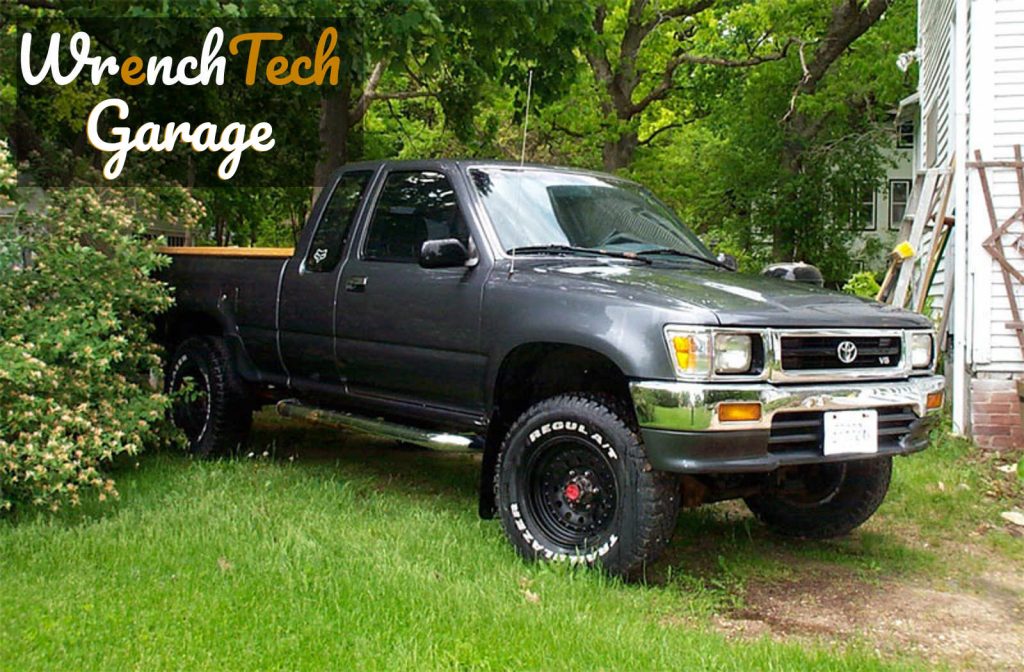
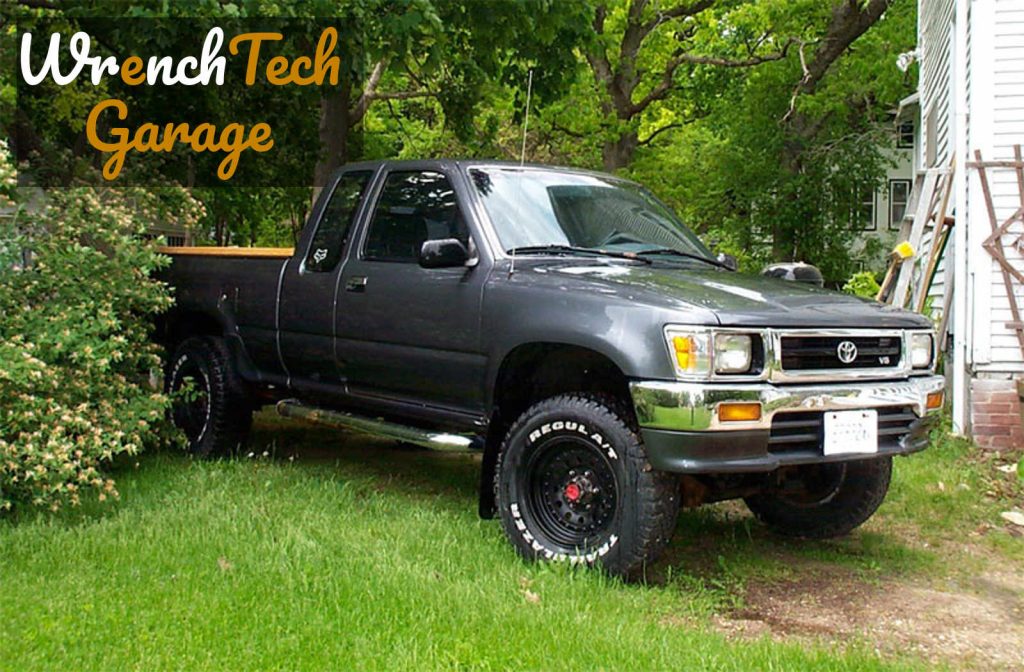
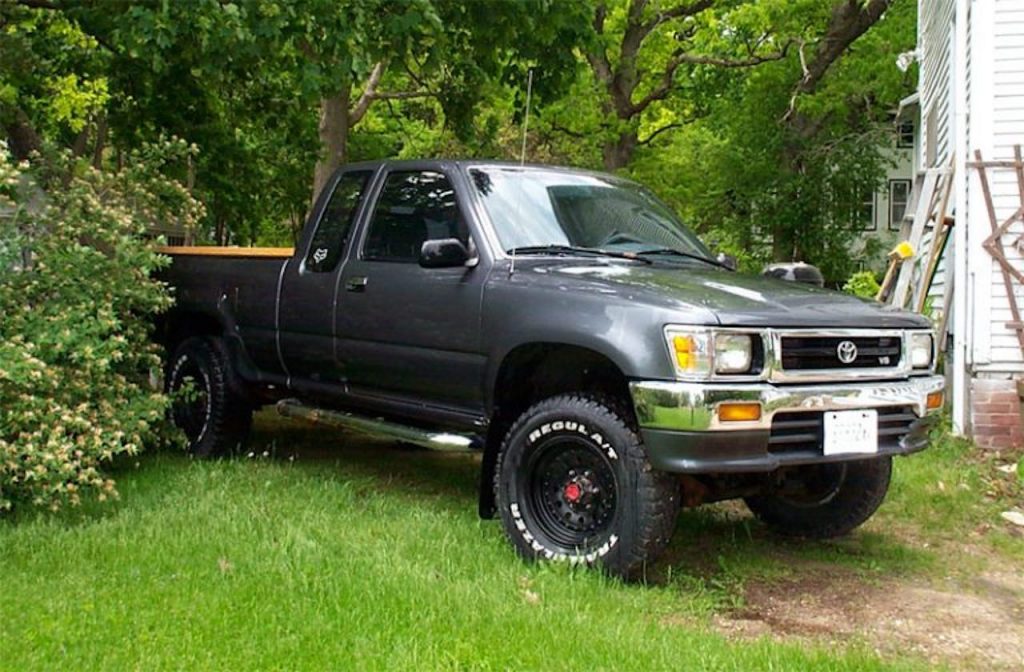
Crazy as it may sound, buying this truck will be a real step up for me. I have owned several earlier generation Toyota trucks in the past and absolutely loved them. This generation of truck was reputed to be a substantial improvement over those trucks, so I am looking forward to step up to a 25 year old truck! What can I say, I am a Toyota diehard.

This is a Wisconsin truck that I picked up with only 115,000 miles on the odometer and a blown engine (the infamous 3VZE, 3.0l V6). A rod broke and punched a hole in the side of the block right behind the A/C compressor. The truck has the DLX trim package and a 5-speed manual transmission. It looks good in this picture but it has some rust as you would expect from a 24 year old truck that has spent its entire life in the Milwaukee, Wisconsin area. It needs a new hood, tailgate and rear bumper. The driver’s side cab corner needs a small amount of rust repair. The frame is solid, except for the tubular crossmember that holds up the rear of the gas tank. The leaf springs and the driveshafts will clean up nicely and I have already secured new used control arms and torsion bars for the front suspension. The rear axle housing is getting sandblasted and will have the drum brakes replace in favor of a custom disk brake set-up. And last, but not least, The engine needs to be replaced.

It sounds like a hell of a lot of work, but I think on balance there is enough good about this truck to justify saving it. I think the picture above supports that proposition. And for me, working on these Toyotas is as much fun as it is work.

The Work Begins

I started by pulling the engine out. It was my first time working with the 3VZE V6. It is a little more of a handful than the more compact 4 cylinder engines I had been working on and so I had a little apprehension about doing the work. I didn’t need to worry, it came out like a dream. First, I stripped off the accessories, the radiator, the PS pump, the A/C comp, the alternator, the exhaust manifolds and the intake ducting. Then I disconnected the driveshafts, the transmission crossmember and unbolted the motor mounts. I put color coded paint markings on all the vacuum hoses, disconnected the wiring harness at the computer and the engine, transmission and transfercase were ready to be lifted out as one unit. Using an adjustable lifting sling and a hydraulic cherry picker hoist, I was able to get the combined assembly out without any trouble at all.

My Thirty Years of Toyota 4×4 Ownership

WTG Blog

31 Years of Toyota 4x4 Ownership

me_mattyd_transparent_bg_100x105
me_mattyd_transparent_bg_75x79

June 19, 2018 – by Matty D

I have owned one Toyota truck or another continuously since 1987 and I am looking forward to owning many more, including FJ60 and FJ80 Landcruisers and the newer 4runners. Here is a rundown on what I have owned so far:

My first Toyota 4x4

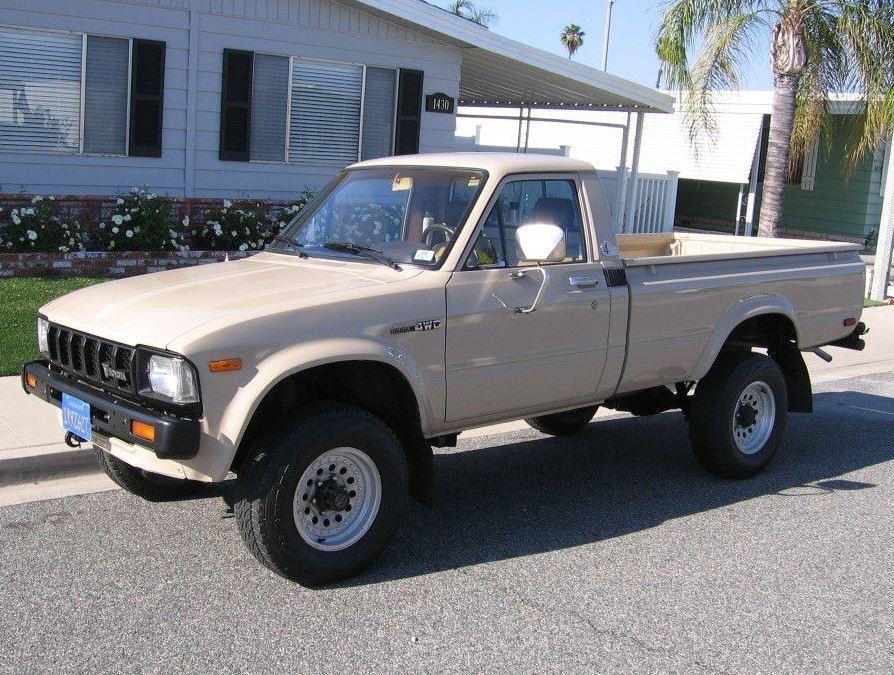
In 1987, I purchased this 1982, long bed, pickup. I bought it from a salvage yard in Wilmington or San Pedro, near the Port of Los Angeles. They specialized in Toyota salvage. It had been in some kind of accident, but it came with a clean title. A spot welded seam on the transmission tunnel had come slightly apart, which made me think that the truck had been hit hard. The price was cheap enough to allow me to disregard any doubts I may have had  and go ahead and buy it. That truck road nicely and never gave me a problem as long as I owned it. When I finally sold it in 1990, the buyer, a guy who was visiting from Oregon, also noticed the seam and asked me if I knew anything about it. I told him I thought it had been in a wreck before I bought it and that it hadn’t give me any trouble. That was enough to satisfy him. He became the third owner of the tan colored 1982 Toyota pick up truck.

My Second Toyota

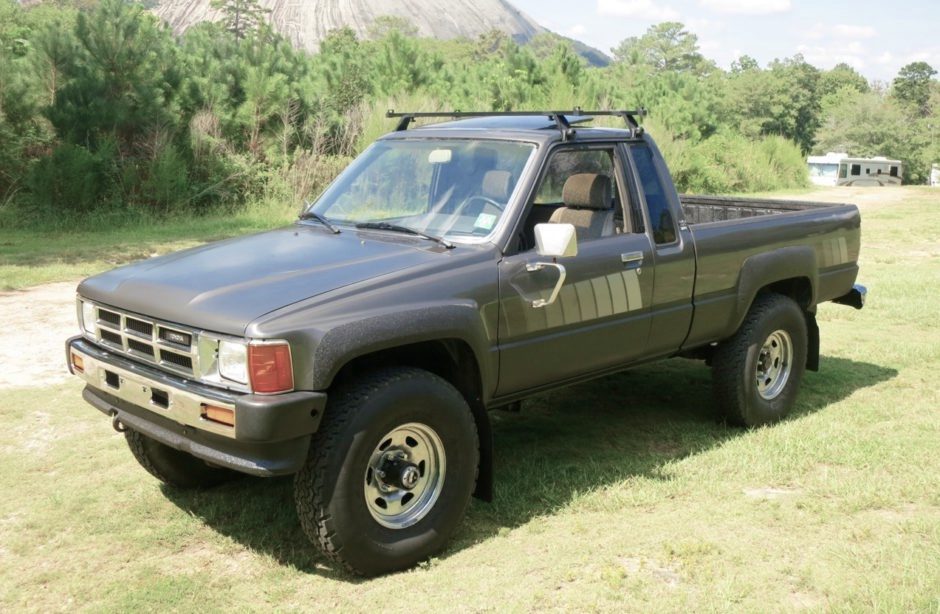
In 1990 I got a dark metallic gray 1984 Xtra Cab 4×4 pickup. This is the truck that really sold me on Toyota trucks. It was pretty much my daily driver from 1990 until 2010. I bought it in California and drove it there for a few years before bringing it to Wisconsin. This was an unfortunate turn of events, because what was once a perfect, never driven in winter, original California truck would eventually be destroyed by extensive rust in both the body and frame.

Getting an old Toyota truck to last for 17 years in the harsh Wisconsin rustbelt conditions was no easy task either.

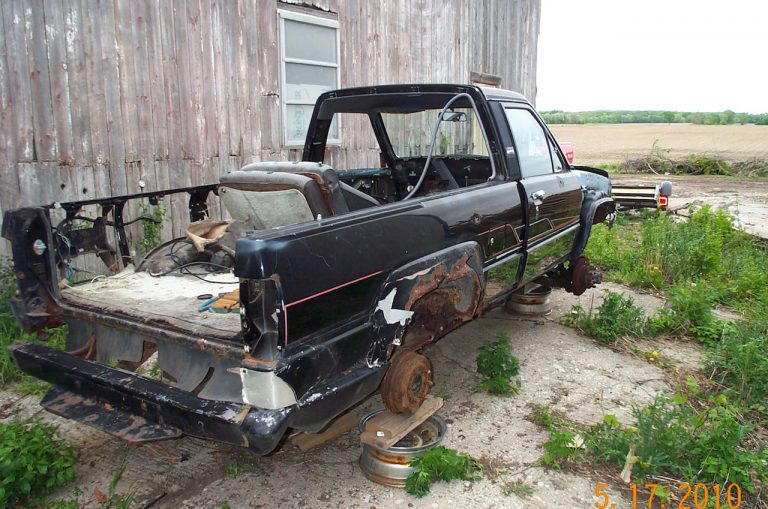
In 1999, I installed a nearly perfect bed that I picked up at a wrecking yard in El Paso Texas. I know it was an Arizona bed because it came with an Arizona license plate attached. I still have that license plate. By 2005 the rear sections of the frame were in desperate need of repairs. I welded in new sections and got five more years of service out of the truck, but by 2010 the rust had returned and spread even farther. The cab corners were also rusting through and there were leaks in the firewall that caused water to drip onto the floor by the drivers feet. The Arizona bed I installed in ’99 was also in pretty bad shape after ten years on the Wisconsin roads. Finally in 2010, the frame rails that I had repaired started to give way. I had gotten 20 years of transportation and enjoyment out of the old truck, but things had gotten to the point where it it was time to put the old Yota into retirement.*

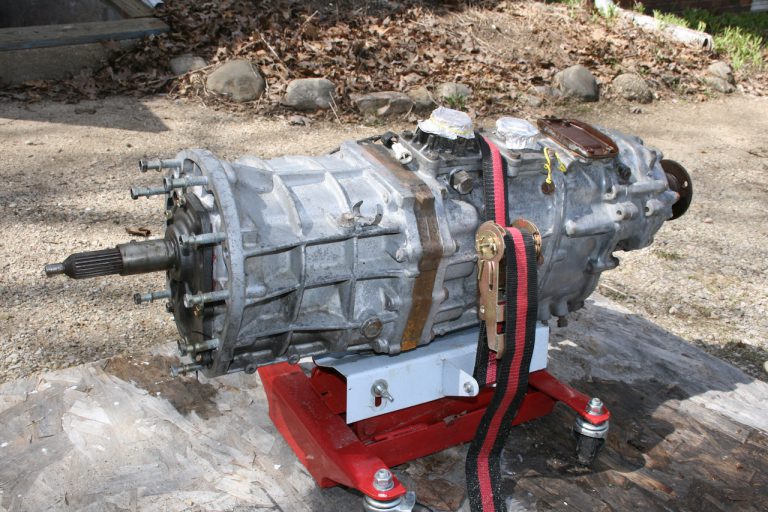
A big part of the enjoyment of ownership came from the upgrades I made along the way. In 2004, I scored one of the legendary R151F turbo transmissions with matching 23 spline transfer case. I bought it from a wrecking yard in Reno Nevada and had it shipped to me in Wisconsin. I paid $400 for the combination. When parting out the remains of the truck 10 years later I was able to sell the transmission and transfer case for $850! I had sold the 22RE/R151 bellhousing a year two before that for $200. That was certainly one of the best investments I’ve ever made. I also upgraded the brakes with superior parts from the Landcruiser part catalog. I put a wider rear axle in, some 1992 Celica GT seats and I upgraded the engine to the 22RE spec, including a full electronic fuel injection upgrade.

I have to say that the 1984 SR5 Xtra Cab 4×4 was the most satisfying car ownership experience I have had in my life so far.

#3 and current: 1989 4runner SR5

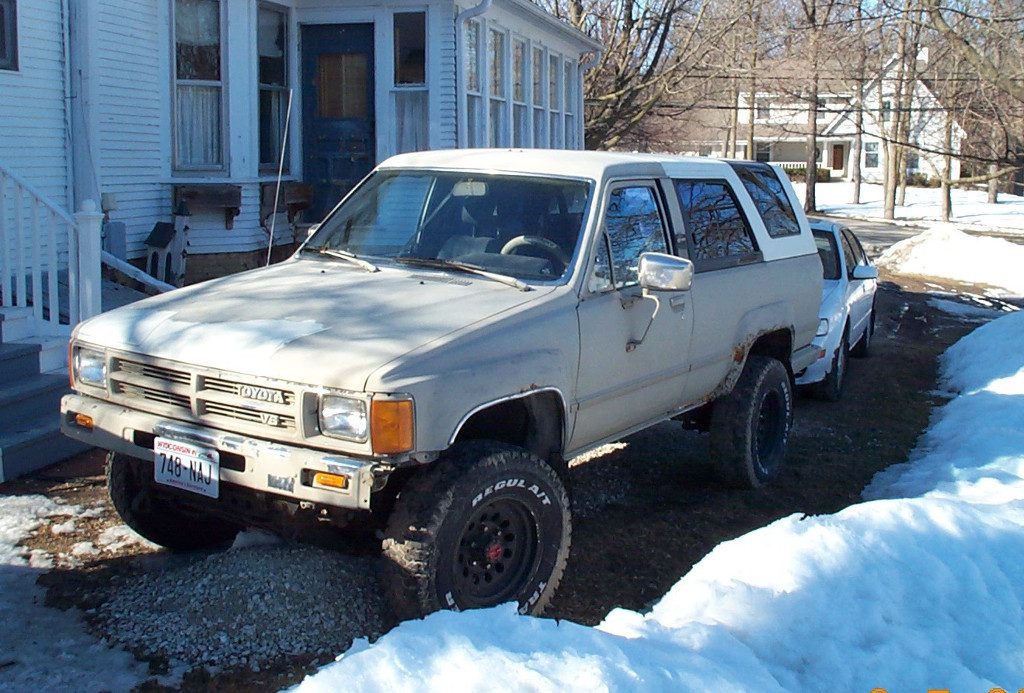
This is how my 1989 runner looked when I brought it home. Kind of rough, but I figured I was just the man to try to save it.

A few years ago, as I was driving to Home Depot to get some lumber for a job I was doing, when out of the corner of my eye I saw this 4runner on the edge of a condominium complex parking lot. You don’t see many first generation 4runners in Wisconsin these days. If they started their lives here, they’ve rusted away and been sent to the crusher a long time ago. I had wanted one for many years and so I had to take a look. I got closer and yes there was a for sale sign on it! I parked my 1984 Toyota extra cab 4 x 4 and got out to get a closer look. It was a little bit rusty in the quarter panels and the front fenders, but I noticed that the hood, the doors, and the tailgate were pristine. The came the clincher. I don’t know what possessed me, but I took the key to my ’84 pickup and put it in the door of the 4runner and it turned! I looked around me to see if anyone was watching. It seem like nobody was, so I slid into the driver’s seat and put my key in the ignition, it also turned with my key and the dash lights came on. I did not dare to crank it over though. I had already gone too far. I quickly exited the vehicle and locked the door. It seemed like I was destined to own that 4runner and so I wrote down the phone number, and the rest is history.

#4 and current: 1993 Xtra Cab DLX

I bought this one off a Craigslist ad. It wasn’t running. Later I discovered that the enging had broken rods and a hole in the block. I am currently preparing a replacement engine and doing some rust repairs. I am replacing a lot of parts on the underside. Among which are, new rear leaf springs, axle housing sandblasted and painted, new driveshafts, new control arms, new torsion bars, and a new exhaust system. Right now, I am going through a used replacement engine. If it checks out, it will get new rod and main bearings, a new timing set, oil pump, water pump and some remanufactured fuel injectors.

 These trucks are ideal candidates for an engine upgrade, so I’m looking at my options for a future engine swap. Two that interest me right now, are the 2014 Chevrolet Ecotec LV3, 4.3 L, an all aluminum V6 with 285 hp and 300 pounds feet of torque, and the Volkswagen 2,0 L TDI diesel, model BHW, out of the 2004-2005 Passat. It will put out 180 hp and 325 lb/ft of torque with nothing more than reprogramming the ECU. The thought of a 30 MPG daily driver truck as good-looking as this is quite attractive.

A Pair Of Parts Trucks That I Picked Up Along The Way

I have owned two Toyotas that were purely for parts only, in 2006 I bought a rusty 1989 4runner for $500. A few years later I traded a little bit of yard work for an also rusty 1988 4runner.

1989 4runner SR5 22RE Auto

I like to think of that old, rusty runner as the gift that kept on giving. Not only did I get an entire fuel injection system and all the supporting parts to upgrade my 1984 Xtra Cab from carburetor to fuel injection, I also got air conditioning and I swapped the narrower back axle in the pick up truck with the wider axle from the 4runner, and in the process got a slightly lower gear ratio, which was a welcome benefit. Now I had a transmission with a lower first gear and a lower gear in my rear differential. I was also able to sell the automatic transmission that came with the 4runner for a small amount of money.

When I was finally done pulling parts off of it,  I cut the quarter panels off, like I was going to re-skin them. I did it for practice so that I would be better prepared if I ever did a full quarter panel repair job. Then lastly, I took the vehicle completely apart down to the last nut and bolt. I feel like I got quite a bit for my $500 investment in the 4runner.

1988 runner SR5 3VZE 5 spd

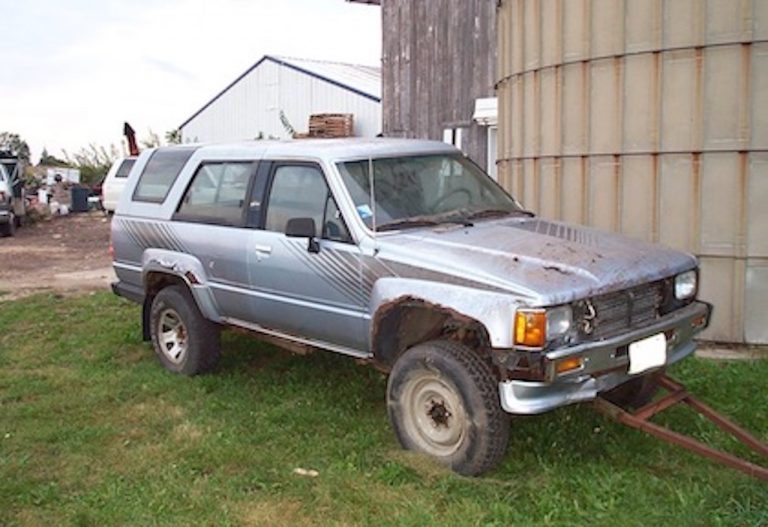
This vehicle was abandoned by a realtor friend’s son, who left it on her property when he moved away. She asked me to clean up her yard and said that I could have the 4runner as payment. I spoke with the son by phone and he said he was okay with the deal. He also said that he could not find the title and asked if I would be okay taking the vehicle without it. Since it was fatally rusted in the frame and pretty extensively rusted in the body, I knew that this vehicle would never be on the road again and so it was no problem for me. 

The only way for me to get it back to my storage area was to flat tow it with the towbar that I made to bring home another 4runner that I acquired a few years earlier. Before I could do that though a few problems needed to be addressed. First off, the prior owner had taken one of the front hubs for use on another Toyota that he had. Secondly there were no wheels or tires for the front or the back of the 4runner. These problems were pretty easy for me to address. I had a couple extra hubs sitting on a shelf in my garage, and rounding up four Toyota wheels with tires wasn’t a big deal either. So I showed up with my 84 extra cab, the towing bar, an IFS hub with bearings and mounting hardware, four wheels with tires and lugnuts, and some magnetic mount towing lights.

It was pretty satisfying to get this vehicle back up on some wheels and see that it was going to go down the road without any problems. The drive was 10 miles back to my storage. The 4 cylinder 22RE powered 1984 Xtra Cab 4 x 4 had no problem towing the 3500 pound 4runner. The 4runner came with expired license plates which I figured would probably be good enough for towing it that short distance. And we are out in the country, so taking back roads was a pretty good guarantee that I wouldn’t run into any law-enforcement issues. I did have the property owner provide me with a signed Bill of Sale that might have been useful if we were questioned. But of course, rusty old Toyota trucks don’t figure in most people’s minds as something worth stealing. 

So what became of this rusty old 1988 4runner? As of June, 2018, I still have it sitting at my storage, which is an area between two barns on a friend’s farm. I yanked the engine out pretty soon after I got it. I was going to rebuild it and put it into my 1993 extra cab, but after I pulled it out I decided that the block was too rusty to be worth rebuilding. I did use the cylinder heads though as exchange cores when I purchased a pair of new heads. I also saved the R150F transmission and transfer case for a future project yet to be determined. The rear axle housing is pretty rusted and has a 4.10 gear set, which makes it pretty uninteresting. What is interesting though, it Is the SR5 instrument cluster, the interior wiring harness, including wiring for the back window (a couple years ago I grabbed the rear window relay box for my 1989 4runner). The fiberglass top was damaged buy some debris falling off the barn a couple years ago but it still has a pair of good quarter windows with decent trim that I am going to use to restore another top that I have. My plan is to have three tops for my white ’89 4runner, white hardtop, black hardtop and soft top (color yet to be determined, maybe tan).

There isn’t a panel on the vehicle that is rusted beyond redemption, except for the passenger side door, which seems to be perfect, and the hood which only has a small spot of rust on the underside. Those parts , along with the SR5 instrument cluster and the R150F transmission, are going to go into the restoration of my 1984 extra cab.

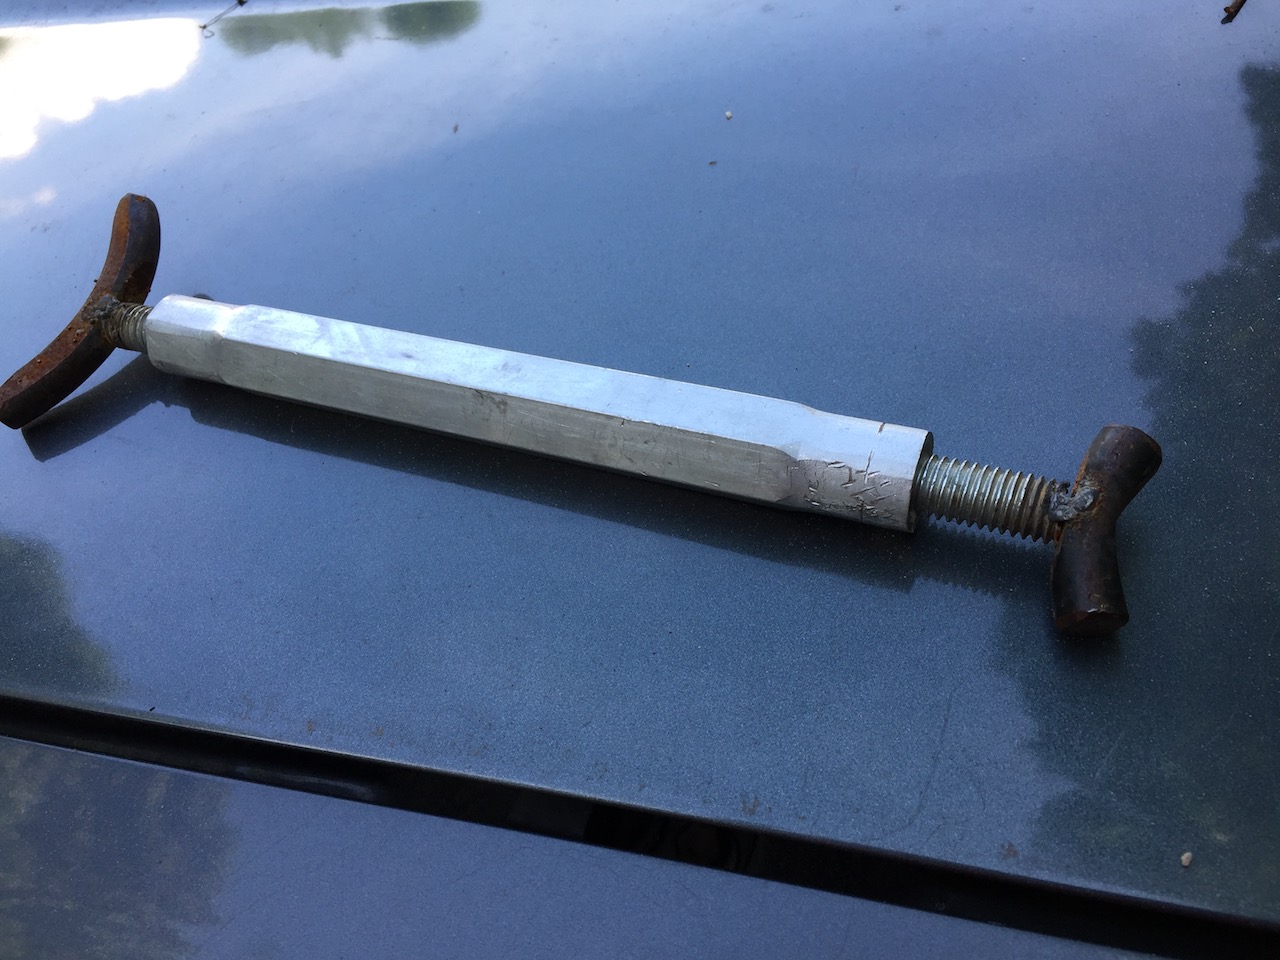
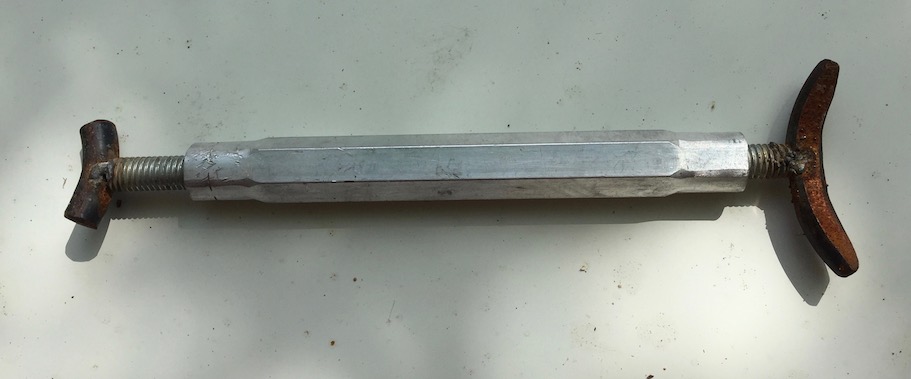
Toyota Belt Tensioning Tool: Made in the Wrenchtech Garage

June 17, 2018 - by Matty D

If there is anything that I like better than using tools, it is making tools. Even the simplest tool, thrown together in a few minutes, gives me great satisfaction. I felt that satisfaction again today as I used my homemade belt tensioning tool to help me solve a squealing belt problem that had developed on my 1989 4runner. Many times in the past I resorted to wedging a prybar between the engine block or the timing cover and the alternator to try to lever it over to get tension on the belt. Working on my first generation 4runner I just couldn’t find away to make those crude methods work, and so I constructed a tool.

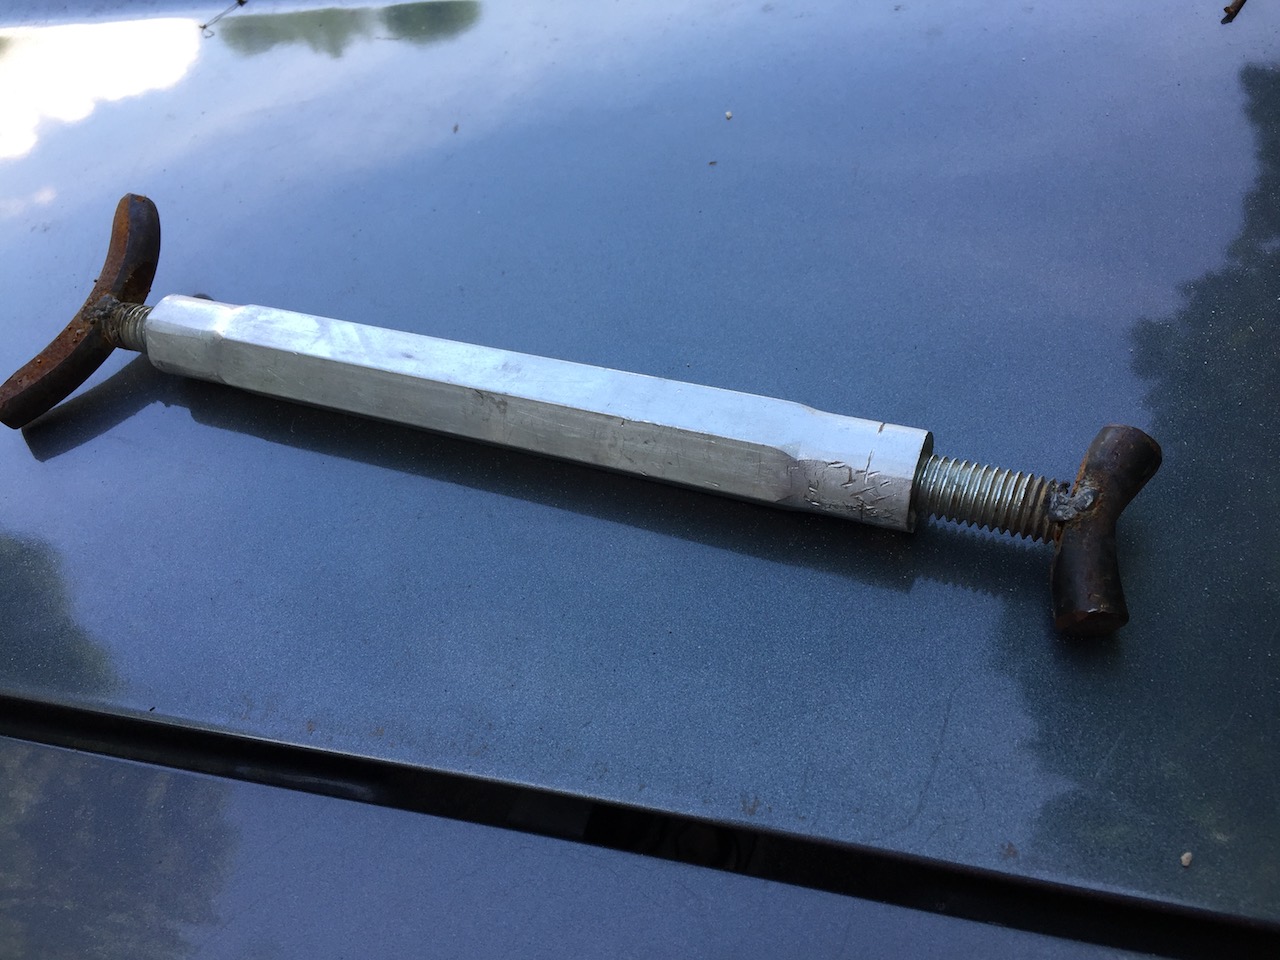
It’s about a simple as things get. I went to the local hardware store and bought a 10 inch turnbuckle. Most hardware stores have them. They consist of a threaded collar that forms the body of the turnbuckle and a pair of screw eyes, one at each end. One of the screw ends has a reverse thread. This allows the turnbuckle to become longer or shorter when the body is rotated. If both had a conventional thread the collar would simply move along the threads without changing the length of the turnbuckle. By having two different threads, turning the collar causes each threaded eye to move out of the collar or go deeper into into it depending on which way the body is being turned. 


This
Into This

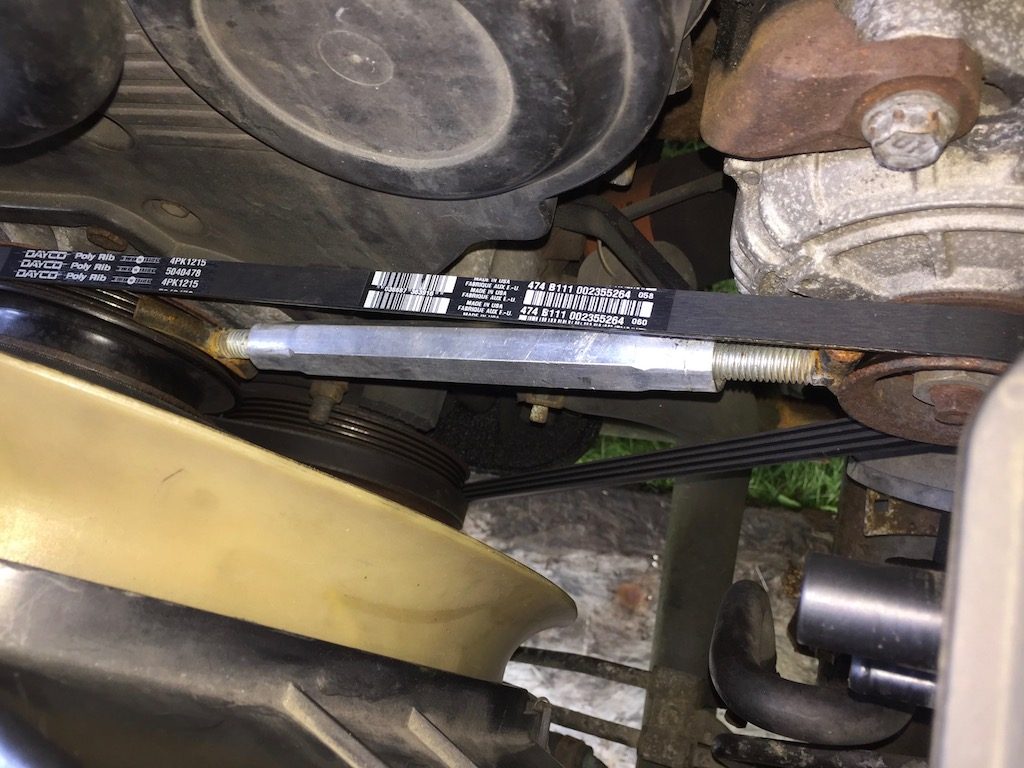
I cut the eyes off the turnbuckle ends and welded some curved sections of steel that I cut out of a junk coil spring that I had. The shorter section goes up against the alternator pulley and a larger section pushes against the crankshaft pulley. Once the tensioner tool is in place I simply turn the collar by hand, causing it to spread out and push the alternator away from the crankshaft. The collar has a hexagonal shape with flat surfaces to grab with a wrench, but I have never had to use a wrench. I’ve always been able to get sufficient tension on the belt just by turning the turnbuckle sleeve by hand. To finish up I just tighten the alternator bolts before releasing the tension tool. 

My custom-made tool works like a dream. It goes into place easily, fits snugly and only takes a few seconds to set the tension. I have a long list of tools still to be made, so please sign up so that I can send you an email when the next project starts.